Pages

Monday, July 30, 2012

Ice Cream Bulletin Board

This is the my new bulletin board in the hallway directly outside my room.


I have seen this bulletin board on Pinterest a few times. I first noticed it posted from Mrs. King's Music Room. The use of the National Standards really caught my attention.


I quickly researched and found that the Ice Cream Scoops are available for free download at this link: http://www.musicbulletinboards.net/printbbs.htm


I printed my ice cream scoops on cardstock and laminated them so they would withstand years of use. I used music note material as the background. I used fluffy quilt batting for the whipped cream. I used a silver Sharpie marker to write on the black bowl.

If you do not have a colored printer, you could also print the words in black onto colored paper. Here is an example found on the musicbulletinboards.net webpage: 


I like the use of iridescent cellophane as the whipped cream in this picture. 

This was the easiest and cutest bulletin board I have ever made. It may stay up in the hallway for open house and through the first parent-teacher conferences and then I may move it into my room permanently. 

ENJOY!!!

Wednesday, July 25, 2012

Getting Ready . . .

Today I went back to school to begin getting my classroom ready. I had a little helper. My 2 yr old daughter seemed to love the Boomwhackers and Lollipop drums the most.


Sure, it looks like a mess, but my Boomwhacker organization system made it easy for my toddler to clean up her own mess. I placed one of each color in the correct slots and she matched the rest of the colors. I love making some kind of game out of clean-up tasks. (If you missed the post on Boomwhacker Storage, click here.) 


Thanks to my Instrument Storage Labels, she was also able to return the lollipop drums to their home. (If you missed the original post about Organizing Instruments, click here.)


This was the true test at whether an organized storage system is worth the time and effort. The answer is: YES! If a 2 year old can clean up after herself, just think how easy it should be for school-age children!

When my room is finished, I will be posting more pictures of my classroom environment.

Thursday, July 19, 2012

To Stop the Train


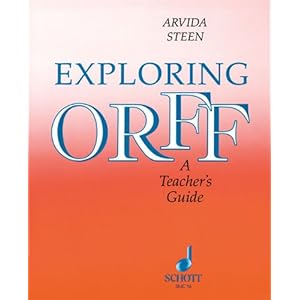
To Stop The Train is an easy round for children to learn. It can be found on page 280 of Arvida Steen's "Exploring Orff: A Teacher's Guide." Arvida suggests adding movement to visually enhance the round, although she doesn't describe any specific gestures. 
Dr. Robert Amchin, head of the music education department at the University of Louisville, has often included this round in his classes and workshops. In the video below, you can see Dr. Amchin first teaching the movements of the round then adding the words one phrase at a time. Last, he introduces the pitches. To create harmony, he allows the class to become the first group while he sneaks in as the second part of the round. He gradually adds people to group 2 until both groups are equal.


This year, my fellow music teachers and I decided to have our students perform this simple round in our Central Area Music Festival. But, we knew we had to make the round longer and more interesting.  First, we started in unison with movements only and no voices. We added one phrase at a time until we sang the entire song in unison. Then, we sang the song one time through in a 4-part round starting 4 beats apart. Last, we sang the song one time through in an 8-part round starting 2 beats apart. Here is the video of our performance. These are the elementary choir students from 3 neighboring schools.


All of the students really enjoyed this round; it quickly became a favorite! For weeks, I would walk through the hallways or lunchroom and hear someone singing or humming it. Whether you are just performing it in class or you are polishing it for a performance, I hope you and your students enjoy this round.


Wednesday, July 18, 2012

Flipchart Download: Welcome Back Class


For several years, I have used this unit with my 4th and 5th graders to review the musical elements, notation, and get them ready for the school year. I have recently uploaded the flipchart to Promethean Planet, but you could totally teach this lesson even if you did not have an interactive white board. (I taught this unit for a couple years before we ever had this technology!) A few of the slides are pictured below. To see a preview of all the slides, follow this link.


This unit will last about 3-4 weeks. (I see my students once a week for 50 minutes.) The rhythm of the poem is adapted from Keetman's "Rhythmische Ubung" Patchen #5.

Here is an overview of the unit:

Lesson 1:

Perform body percussion; Review rhythmic notation; Perform poem in a 2-part round with body percussion.


Lesson 2: 

Transfer rhythms to hand drums; Perform in a round; with and without words; Introduce melody.


Lesson 3:

Review melody; Sing solfege with hand signs; Review staff and label pitches; Transfer to Orff instruments.


Lesson 4: 

Review melody. Add student improvisations; Perform in rondo form.

I ask the students to improvise with a simple sentence: "We are Cedar Grove." (ta ta titi ta).


I hope you enjoy this unit. Share your adaptation and let us know how you personalized it for your school!

Monday, July 16, 2012

Flipchart Download: Apple Tree, Apple Tree

Another flipchart is available for free download. This flipchart features the game song "Apple Tree, Apple Tree." A preview of each slide can be found on Promethean Planet

Introductory Activity

First, students see stick notation and count rhythms. Then, students get to drag the whole apple and apple slices to make iconic notation representing quarter notes and eighth note pairs. Students will review sol and mi pitches and get introduced to la. 

Game Song

I'm sure most of you are familiar with the game to accompany this song. If not, here are the rules we use in my classroom:

*This is an elimination game.
*Students stand in a circle facing counter-clockwise.
*One student has a ball and sits in the middle of the circle with their eyes closed.
*While singing the song, students walk to a steady beat around the circle. (They stay single file and cannot pass another student.)
*When the song is over, the students freeze and the child in the middle rolls the ball (eyes closed).
*The first child touched by the ball is knocked out. (Avoid large gaps in the circle. When the ball goes between 2 people, the teacher picks who the ball was closest to.)
*The child knocked out gets to become the tree and roll the ball next time.
*The child who already had a turn being the tree is eliminated.
*Continue until only 1 child remains in the circle.

Optional Steady Beat Assessment

During elimination games, it is always nice to give students an extra special job after they have been eliminated to have them focus on something positive (like playing an instrument) instead of the negative (not winning the game). Repetitive game songs also provide the perfect opportunity to observe students for a performance assessment (either singing or playing). In this game, the students get to take turns playing the harmonic accompaniment on the bass xylophones and I observe them playing the steady beat.

*After each student has a turn being the tree and rolling the ball, they get to come to a barred instrument to play harmony.
*If you are in the key of C, students should play C and G. (I always prepare the instruments for the pentatonic scale ahead of time and remove F and B)
*Teacher should have the gradebook ready to record how well each student performs a steady beat. 
*Encourage students to sing along. If students are off beat, singing along to the song usually corrects this.


Instrument Set-Up Variations:
Choose the best set-up for you and your students. If they are not used to this type of performance assessment, you may have to start with just 1 student at a time.


4 students at a time:
You could use 2 instruments and have 2 kids on an instrument rotating through the seats. (Each student would get to play 4 times before going to the elimination area.)


2 students at a time:
You could use 1 instrument and have 2 kids share.
You could use 2 instruments where each kid has their own.
(Each student would get to play 4 times before going to the elimination area.)


1 student at a time:
Sometimes I play with the student and share an instrument. (Each student would get to play 1 time before going to the elimination area.)

All of my uploaded flipcharts can be found at this link on Promethean Planet.

You may also like my post on Interactive Music Flipcharts 

Friday, July 13, 2012

Interactive Music Flipcharts


In May, I blogged about Technology In the Music Classroom. I talked about many wonderful tools we acquired during a construction renovation, including the interactive white boards. We have Promethean ActivBoards which run on ActivInspire Software. In this post, I will share some flipcharts that I have submitted to Promethean Planet and are available for free download. There are brief descriptions below, but you may also click the links to preview the slides before downloading.


This flipchart uses the poem "I Spy Elenore" in a 2-3 lesson unit. First, students will perform rhythms with body percussion (option to also perform in a rhythmic or melodic round). Students will count the syllables in candy bar names to discover the rhythmic pattern for each. Students will compose rhythms using candy bar rhythms. There is a printable worksheet for students to compose on their own after practicing on the Activboard. The final performance could be in rondo form, alternating "I Spy Elenore" with candy bar patterns.


In this lesson, students will perform a rhythmic ostinato on body percussion to accompany a poem "Once I Caught a Fish Alive." Then, students will try to identify which words the stomps, claps, pats, and snaps occur on. The body percussion will be transferred to unpitched percussion to accompany the poem. Encourage students to try the ostinato with and without the words. I can complete all these activities in one 50 minute lesson.


This flipchart features 20 multiple choices questions. Students view an instrument and identify it's instrument family. This can be used with clickers student response system or with paper and pencil. The key is included. 


This flipchart is used for a 3-lesson unit. It uses the poem "One For Ice Cream" to review rhythm, melodic contour, form, and improvise on xylophones. The final performance would be in rondo form alternating the song "One For Ice Cream" with improvised solos using ice cream flavors as rhythmic building blocks. Be sure to check out the notes on the slides for more tips to assist you through this lesson.


In this flipchart, students perform rhythmic ostinatos with body percussion and unpitched percussion to accompany the poem "Cobbler, Cobbler, Mend My Shoe."

***Although all these flicharts are entirely my own creation, the lesson sequences for "I Spy Elenore," "Once I Caught a Fish Alive," and "One For Ice Cream" were adapted from lessons presented by Brian Crisp during Level I Orff Training at the University of Kentucky during the summer of 2006.

More About Promethean Planet

Click here for a direct link to view all my uploaded flipcharts:
http://www.prometheanplanet.com/en-us/Search/resources/?Author=819220
At this moment, these are only 5 that are polished and uploaded. As I add more, I will also blog about them.

Also, feel free to add me as your friend on Promethean Planet. Here is a link to my profile page: http://community.prometheanplanet.com/members/rebecca.dennis/default.aspx

If you have an Activboard, make sure you also check out these
Free Resource Packs:
Music Notes and Scales Resource Pack
Music Tempo Resource Pack

Thursday, July 12, 2012

Once Upon a Musical Pair


As we are approaching the end of the summer, I thought some of you may be examining your wishlists and ordering new materials for your classroom. I thought I would share some recommendations.

I absolutely love these 2 books:

"Once Upon a Folk Tale" and "Once Upon a Mountain Tale" by Linda Rockwell High and Carol Kindt. 
They are each $14.50 at westmusic.com. They are each $15.95 at amazon.com but eligible for FREE Super Saver Shipping. I suggest you visit Amazon to take a sneak-peak inside  "Once Upon a Mountain Tale" to view a few pages and see if you like it. Both books are formatted the same way.

Each book has 8 stories set to music. 
"Once Upon a Folk Tale" includes:
Chicken Little 

3 Billy Goats Gruff  
How the Camel Got His Hump
The Boy Who Cried Wolf
The Fox Who Lost His Dinner 
The Gingerbread Boy
The Old Woman and Her Pig 
Silly Jack

"Once Upon a Mountain Tale" includes 6 Jack tales and 2 Grandfather tales set to melodies from Appalachian folk songs and fiddle tunes. (I teach in Kentucky so this book was an awesome addition to my resource library!) 


Orff Arrangements

When it is time to insert a song, the reader will see a treble clef appear in the story. Although you could sing the melodies with an accompaniment, the songs include very simple Orff arrangements. Due to time constraints, sometimes I teach only the bass part. You could adapt the arrangement to meet your need by omitting or adapting some of the instrument parts. You could also play some of the parts on the piano to accompany the singing. If you are a string player, you would definitely want to bring your instrument to accompany the Appalachian folk tunes!


Sound Effects

 The characters in each story have specified sound effects with a variety of percussion instruments. The selection of includes: claves, cowbell, finger cymbals, guiro, hand drum, maracas, tambourine, temple blocks, vibraslap, wood block, cabasa, chime tree, gong, log drum, metal shaker, piccolo blocks, ratchet, recorder, sleigh bells, snare drum, suspended cymbal, timpani, triangle, wind chime, bass drum, conga, slapstick. If you don't have some of these instruments, you could make some substitutions. The characters that have sound effects appear in bold in the story to signal to the reader to pause to hear the sound effect.

Visual Aids Included!

The appendix of each book includes visuals for each character you can copy, color, and laminate to serve as visual aids during the lesson. I always glue mine onto cardstock and laminate them so they will last from year to year. I lay the visual on the carpet in front of each instrument group to remind them which character they are representing. I store them in ziploc bags and use a binder clip to keep them with the book.

Drama Integration!

The stories are short and simple and could very easily lead to dramatic performance in the classroom or for a public audience. Elaborate costumes and props are not needed, just an active imagination! I have never performed this for parents, but have often invited classroom teachers to come to a few minutes early to see a special performance. Unfortunately, I have never recorded any of these performances on video. If I ever record one, I will share it with you.


Substitute Teacher Plans!

The instructions are very simple. I have the "Chicken Little" story on stand-by as emergency sub plans. The substitute could very easily incorporate the percussion sound effects but would most likely omit the Orff melodies. I have recorded my voice singing each of the melodies so they can listen and play them for the students, since the sub most likely won't be able to read music. 

If you order one or both of these, I'm sure you'll be happy with your purchase!


Wednesday, July 11, 2012

Treble Clef Candy Cane Ornaments

Since I've been seeing all the "Christmas In July" advertisements on television commercials, I thought I would blog about something I made for my choir and Orff kids at Christmas time.

As I was driving home that evening after our Christmas concert, I was overwhelmed with pride and joy. My students had performed amazingly and I felt compelled to do something for them. The concert was on a Thursday and the last day of school was Friday. Whatever I did had to be done that evening and couldn't cost a ton of money. Then, the idea just hit me. I could turn a candy cane upside down and add a pipe cleaner to make a treble clef.


I stopped by the Dollar Store on my way home and bought some colorful candy canes (Spree brand). I had pipe cleaners already at the house. I used hot glue to affix the pipe cleaners to the candy canes. I taped them to a card that thanked them for their hard work and told them to hang the treble clef on their tree and do not open until after Christmas. I plan on making them again this year (unless I magically get a different idea on my drive home one evening)! I may even buy the materials and have them make their own! That would be a nice assessment, to see if they could bend the pipe cleaner to make a treble clef!

UPDATE: I have created a video tutorial and shared a printable card to go with the ornaments.
Click here for the link.