Monday, June 11, 2012

We Love Phil Tulga!

My students and I love the website of Phil Tulga! If you are not already familiar with his site, here is a brief introduction.
He has many music games that integrate language arts, math, and science. He also has several different instructions to make homemade instruments.


Here are a few of our favorite games:

Musical Fraction Bars


This activity describes how to measure and make your own musical tubes similar to Boomwhackers. The interactive game allows students to compose with the colored bars and even play back their music in various tempi. The students can create harmony by stacking colored tubes. The colors of these tubes match the colors of the Boomwhackers; so, after composing a song, students can use Boomwhackers to play it themselves. There are also several preloaded songs students can choose to start with and then alter to make a variation. The students can create a song and then email it to a friend, parent, or teacher! This game provides endless fun!

Cucumber Pickle Machine


My students LOVE the Cucumber Pickle Machine. I don't know if it is the silly face made by the machine or just their love of pickles, but they could spend the entire class playing this game if I would let them! This game explores mixed meter with the 3-syllable word "cucumber" and the 2-syllable word "pickle". The white cucumbers and pickles are silences. Phil has also listed several popular meters for the students to create on the machine: rhuma, flamenco, clave, heartbeat, conga, short bell, fanga, samba, and the most popular "Mission Impossible."

Unifix Drum Machine


This game allows students to compose layered rhythms. The ostinatos repeat on a loop but you can also change the tempo. You can control which part you hear by turning each on or off by one easy click. You change the color of each square by clicking the square: blue=low, red=high, yellow=silence. There are several patterns available for the students to choose from or they can start from scratch and create their own. The students can see how there are 4 cubes grouped together. This can represent 4 beats in a measure or 4 subdivisions of the beat. After exploring this game on the interactive white board, give the students real Unifix cubes to create their own rhythms! 

There are many more activities available on Phil Tulga's site! Go, explore, and share your favorite Phil Tulga activity!

Thursday, June 7, 2012

All About Voices


In the previous post, I talked about using voice cards as visual aids. In this post, I will explain a couple activities that use the visual aids. At the bottom of the post, you can download the pdf and print them for free!

Name Game

For 1st grade and kindergarten, I always review voices on their first music class of the year when we are doing name games. We do simple echos:

Teacher:  "My name is Mrs. Dennis"
Class: "Her name is Mrs. Dennis"
Student: "My name is Joshua."
Class: "His name is Joshua."

thekinderkid.blogspot.com
After we go once around the circle learning names, I introduce the voices with the cards. (I also tie this to our school-wide voice level system. I do not have a picture of our voice level posters, but I found a similar one from The Kinder Kid. Our numbers and levels are the same, but we don't have the cute clipart.) When the students understand the voice levels, we get to go around the circle again saying our name to the beat, but this time each student secretly picks a voice (whisper, speaking, calling, singing). We must echo using the same voice and then I ask the class what type of voice they used.

Voice level zero

For the past 3 years, since I have been relating these voices to the voice level number, the kids always ask to say their names with voice level zero. We now call it "Magic Lips". Anytime I want the kids to move their lips without making a sound, I ask them to use Magic Lips. I actually use this with all grade levels. I usually ask for Magic Lips when I had the kids patting a rhythm while saying a poem and then I want to hear their patting by itself. I also ask for Magic Lips when students are using Curwen hand signs and I want them to stop singing and focus on the pitch levels.

Acka Backa

I use the voice cards often in repetitive games, just to break up the monotony. One example is an elimination game: "Acka Backa." Here is the poem if you are not familiar with it:

Acka Backa, soda cracker
Acka Backa, boo
Acka Backa, soda cracker
Out goes you!

There are many variations to the words; you may know a different version, but this is how we play. This is a simple elimination game. To prepare the students, I have them stand in a circle and pass a ball around to the steady beat. We first practice passing to the beat at different tempos. I usually hold a buffalo drum and stand inside the circle showing where the ball should be. If the ball passes up the drum, they know they are going too fast. When they are focused on the beat, we introduce the poem and the rules. The last person to hold the ball on "you" leaves the circle. The student gets to go to my chair where I have the voice cards laying face down. They pick a card to tell us which voice to use next and then they get to mix them up again for the next person. Elimination games are always tough for the kids who always want to win, but going to select a card seems to ease the disappointment that they are out of the game.

Free Printable:

Voice Cards (whisper, speaking, calling, singing)

I suggest printing them on white cardstock and laminating them.


Monday, June 4, 2012

Assessing Music With a Line-Up Song


I learned this song from my KTIP mentor, Alicia Franklin, during my first year teaching. I introduce this song in kindergarten and we sing it everyday when we line up. 


I sing the first note as a fermata and hold it until every student is joining in and doing their job to line up. There are hand motions to accompany the song. On the first word "my", we raise our hands in the air (this makes it easy to see who is actually paying attention in line and ready to sing the song). Then, we do what the song says. 

           Phrase 1: place hands back
           
Phrase 2: exaggerate good posture
           
Phrase 3: take 2 fingers, point at eyes then 

                 straight ahead
           
Phrase 4: hands return behind back
           
Phrase 5: zip lips, pretend to put in pocket, 

                 hands return behind back, mouth is closed

When the kids get to 1st grade, the song only makes guest appearances when we need help remembering how to line up or when I want to see if they can apply the musical concept we just learned.

Using the Song For Assessment


Assess Tempo

If we learned about tempo that day, we may choose a tempo (largo, moderato, allegro) and sing our song accordingly. They may also get to line up to a tempo. I may ask them to show me allegro feet, largo feet, or moderato feet to line up. Depending on how much time is left in class, I may do this individually  or in small groups. If I do it individually, I usually take notes in my grade book for a performance assessment. Older students can watch the conductor and respond to accelerandos and ritardandos.

Assess Dynamics

If we learned about dynamics that day, we may choose a dynamic level for the entire song (piano, mezzopiano, mezzoforte, forte) or watch the conductor to see how the dynamic levels change throughout the song. Older students can usually remember a pattern to assign different dynamic levels to each phrase. Similar to the game discussed above, sometimes we can line up with piano feet (tiptoeing) or forte feet (stomping). Again, depending on the time remaining in class, this is either done individually or in small groups and is sometimes used as a performance assessment.

Assess Melody

If we learned about melodic direction that day, we may use our hand levels to show the melodic contour. (That's why I like the simple shape of this melody going upward then downward.) If we discussed pitch, we may sing it in a high key or a low key.

Assess Harmony

If we learned about minor harmony (Halloween), we may choose to change the song to minor and make it sound spooky. (All the kids LOVE this!)

Assess Timbre

If we discussed different types of voices (speaking, whisper, calling, singing), we may choose to use different voices to use throughout the entire song, or we may change our voices for each phrase. I also have voice cards that I can hold up and show the students what to change to. (View the next post for printable voice cards.)

Assess Rhythm

If we discussed rhythm (long and short sounds), we may sing the song exaggerating note lengths in tenuto or staccato style. If we discussed a fermata, we may choose one or two words to have a fermata and sing those words really long.

Coda

These are just a few examples of how I use our line up song for assessment. Sometimes, instead of telling them how to sing it, I let the kids pick a variation to sing. Again, I only sing it every time with kindergarten; and they never get tired of singing it. It only appears occasionally with older grades. It appears sometimes as a warning to those not ready for the hall: "Do we HAVE to revisit kindergarten and sing the line-up song?" Their behavior is quickly corrected. Many older students LOVE the line up song, as it brings nostalgia from kindergarten. 

Even if you have a line-up song already in place, you could probably use these assessment strategies with your song as well. I would love to hear other ideas to use line-up songs as assessment tools. If you have some more ideas, please comment below.

Thursday, May 31, 2012

Are You Snipping?


If you are not familiar with the Snipping tool, get ready for your world to be rocked!

How To Use It?

Most people think the Snipping Tool was new with Windows 7, but it is installed on both Windows Vista and Windows 7 operating systems. If you are not sure if you have this tool, do a search in the start menu or look under Programs and Accessories. The Snipping Tool can be used to take a picture of anything on your screen. It is very basic and simple to use, but you may visit Windows for a simple tutorial and frequently asked questions.

If you learn best by watching someone else, you may find this video tutorial helpful: (video by VideoTraining.com.au)
At the end, the video demonstrates how to pin the tool to your task bar or start menu. As you start using this tool more frequently you will definitely want it easily accessible. I have my Snipping Tool pinned to my task bar.

When To Use It

1. Capture images from your computer or the web to use on your interactive flipcharts or powerpoints. Specific to music, I like to snip musical notation from Finale Notepad (or the notation software of your choice) and paste it into my flipchart.

2. Create screenshot tutorials for students, staff, or your blog.

3. Create picture collages of just about anything. (Mrs. Teachnology suggests using collages as writing prompts).

4. Capture text from a word document to post on your blog, classroom webpage, or newsletter. (Math Coach's Corner demonstrates this by taking a snip of her grading scale and pasting it into another word document.)

5. Email your snipped image to anyone very quickly. (This was demonstrated in the video above).

6. Take a snapshot from a paused video. It may not be the best quality picture, but it is probably the simplest way. Play the video with Quicktime, Windows Media Player, or the program of your choice. Pause the video at the moment you would like an image. You may use the slider to adjust the image so that it is more focused. Then snip away!

7. Create customized worksheets and tests. Using a document camera or a scanner, you can snip individual questions from different worksheets and tests and combine them into a brand new document.

8. Create an image for a pin when no image could be found. (It is frustrating when you try to pin something and the only image Pinterest can find is the header art of the blog. Now, you can snip a chart or the title heading to use as your art to pin the page and give a better clue at the material you are trying to share.)

9. Capture images from  your interactive flipcharts or powerpoints to save for reference later or to post on your webpage for parents and students to access at home. You could also print them for a small personal reference or study sheet.

10. Capture images from textbooks or other printed materials to insert into your flipcharts or powerpoints. (You would need a document camera or scanner.) This is my favorite thing to do so I only have to adjust the camera focus and position the book one time. I snip the image, paste it into my flipchart, and it is ready when I teach that lesson to the other classes in that grade.

These are just 10 ways the snipping tool can be used for the classroom, but the possibilities are endless! I hope you find a way for the snipping tool to make your life a little easier!


Wednesday, May 30, 2012

Star Musicians Classroom Expectations

During student teaching, I developed these 5 basic classroom expectations:

1. Enter and leave quickly and quietly
2. Show respect to others and the instruments
3. Participate in class activities
4. Raise your hand to speak
5. Follow directions

I wrote them on a poster board and taped them to the wall. I quickly learned that these rules did not mean anything if there were no consequences to accompany the rules. Also, the rules meant nothing to the younger students who could not read. So, I knew I had to revise my discipline system.


 First, I wanted something visually appealing with picture clues to help the young ones understand the rules. Each rule is printed on a 8.5 x 11 sheet of cardstock and laminated. I found a pack of 30 gold die cut stars at the Dollar Store for $1.00! I laminated them and put some magnetic tape on the back. I placed one gold star next to each rule. If the class is not following one of the rules, the magnetic star is taken away. I decided to call it STAR MUSICIANS!

Star Musicians System


On day 1, I try to talk as little as possible and get right into music-making, but you must go over your procedures and expectations. Instead of boring them with a lecture, I pick students to look at each poster and tell the class what they think we should do in music class. The picture clues are especially helpful for the younger students who cannot read yet.

Each class starts with 5 stars, but if anyone is not following one of the rules, the entire class loses a star. At the end of each class, I record how many stars remain on the board. At the end of each month, I would reward one class in each grade that received the most stars. They would become star musicians for the month and get to hang a door hanger plaque on the flag pool outside their classroom door.

Individual Discipline Records

Each student receives a conduct grade for music class in addition to their music grade assessing core content. To keep track of conduct, I make notations in the grade book anytime a student is not following one of the expectations. I mentally number the rules 1-5 in the order they appear hanging on my board. If a student is repeatedly forgetting to raise their hand before speaking, I would mark X4 next to their name for that day. That is a short-hand that tells me they were not following rule number 4. If there is a major violation (such as hitting another student or cursing at the teacher, I make a special note on the bottom of the page in the white space). This way, I have an accurate record for each student. It makes it easy to do report cards each quarter and it also protects me if a parent questions the grade their child received. 

Communicating With Classroom Teachers

In this picture, you can see the rules next to the magnetic stars. To the left of my classroom rules you will see a rainbow chart for our school-wide discipline system. This system was newly-established this year. As a special area teacher, I LOVE having the entire school on the same discipline system. Also, this system is both positive and negative. Each student has a clothespin and starts the day on green (Ready To Learn). Throughout the day as they make good choices or bad choices, they may clip up or clip down. I love the fact that they can clip up! Often a student would come to me for music class in a defiant mood and wouldn't even try to behave for me because they were already on red or didn't have any more sticks to pull. With this system, no matter what choices you make, you always have a chance to redeem yourself with good choices. We do have a rule that in special areas they can only clip up or down one time. 


Obviously, the students' clothespins cannot travel with them to special area classes. So, we have a miniature rainbow chart (shown above) to remind the students of the color order. If the students clip up or clip down in my class, they write their name on the small clipboard. There is a smiley face and sad face to help the students who cannot read. In my class, the students write their own name on the clipboard. That walk to the clipboard is a nice reward for those who are going to clip up and makes those clipping down more responsible for their actions. Plus, I can continue teaching while they are writing their name on the clipboard. The issue of honesty has come up on a few occasions where someone has written their name on the wrong side or pretended to write it. With cases of dishonesty, the student will automatically clip down twice. This new rule has eliminated most dishonesty. At the end of class, I take the paper off the clipboard. The clip downs become X's (with the corresponding numbers for the expectations they did not meet). If a student clips up, I place a star next to their name for that day. This gives them bonus points to bump their grade up to exceptional. the paper is then handed to the classroom teacher when it is time to leave and the students will move their clothespins when they get back to their classroom.

Free Downloads


Coda: Art???

Do you have an art teacher at your school? New this year, my principal asked me to teach art one week of the month during the music time. I have a separate classroom for art class, so I just modified my music expectations slightly. If you would like these for your art teacher, they are also available to download!


Tuesday, May 29, 2012

Making and Swapping Buttons

I just followed a simple tutorial from Between Naps on the Porch:

"How to Make a Blog Button With Grab Box Code Underneath for Your Sidebar


I now have a grab button of my own! If you copy the code under my button and paste it into a box on your sidebar, my button will appear on your page. 

I have already listed other music blogs on my page "Other Music Blogs." I checked them for buttons and have already grabbed the button from "Melody Soup". Unfortunately, none of the other music blogs I follow have created buttons. This tutorial was very simple. If you create a button for your blog, please let me know and I will add it to my sidebar. Likewise, please grab my button!

Monday, May 28, 2012

Free Online Metronomes


For several years, a pendulum metronome was on my classroom wishlist; I wanted students to be able to see the arm moving side to side with the beat. But, with our dwindling budget, I could never justify spending that much money on a visual aid. The classic Wittner is currently on sale on westmusic.com for $57.20.

In 2010, I started searching online for interactive metronomes. Most of the metronomes I found were digital. They were perfectly fine tools for musicians to use for practicing, but none provided the moving arm that I wanted the students to see. 
www.metronomeonline.com
www.webmetronome.com
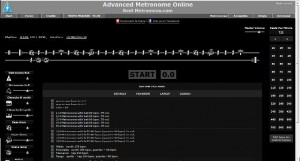
advanced.bestmetronome.com
  I was looking at the suggested resource sites from my district's technology department and saw the online-stopwatch site. They have a lot of neat tools for counting time, etc. So, I emailed a suggestion that they add a metronome and they were very interested. They sent me emails as they were developing the tool and I got to provide input throughout the design process. It felt amazing to make a suggestion and have someone actually listen. 


www.online-stopwatch.com/metronome

This metronome has 6 different sounds to choose from. It has a volume control so you don't have to change the master volume of your entire computer. Down in the corner the Italian tempo terms are listed next to the beats per minute (one of my suggestions). This is also available for free download! They even wrote a little message at the top giving me credit for the suggestion!


If you are not familiar with online-stopwatch.com, you should check it out. There are many varieties of timers and counters. A few are available for free download. I have the basic timer as a shortcut on my computer desktop for quick and easy access. Many teachers use these timers everyday for timed activities. There are many varieties you can change them often so the students do not get bored.

http://www.timrylands.com/2011/03/17/clocks/

Although I did not find this during my searches in 2010 (it likely was not in existence then), today I found another mechanical metronome that features a movable pendulum arm. This metronome looks more life-like. When you first start the metronome you even hear sounds as you wind it up. However, the background is black and that makes it very hard to see on the projector in my classroom. Also, it only features one clicking sound, whereas the online-stopwatch metronome has six sounds to choose from. You may choose which one works best for your classroom.
simple.bestmetronome.com

The most important lesson I learned during this entire process: "ask and ye shall receive." I was frustrated that I could not find the resource I wanted. I thought other teachers may have the same frustrations, so I made a suggestion and someone actually listened! How amazing! It would be a wonderful world if every concern and suggestion were answered so swiftly. I realize this world is in my fantasy, but you never know who is willing to listen if you don't even bother to ask! I hope you can find some of these free online tools helpful. If you can't find a tool to meet your needs, don't be afraid to email your suggestions! Someone might actually listen!

THANK YOU, 
ONLINE-STOPWATCH.COM, 
FOR LISTENING!