Showing posts with label games. Show all posts

Sunday, January 24, 2021

Scratch: The Mitten & The Cold Lady


The challenges of distance learning have led me down a deep rabbit hole to learn how to code. I have been using Scratch to create interactive music experiences where students can play virtual instruments. If you missed my first post on Scratch, click this link

My latest projects involve books-There Was a Cold Lady Who Swallowed Some Snow (Lucille Colandro) and The Mitten (Jan Brett). Both these stories are additive, starting with one character/item and adding on more and more as the story progresses. Additive stories are great to turn into sound stories adding musical sounds to represent the characters/items. This helps students focus on listening to the music and learning how to keep their instrument quiet when it is not their turn.

While teaching virtually, these lessons would be impossible without the help of virtual instruments. I used Scratch to code the games. I recorded myself reading and singing the story. This will begin when they click the play button. When they click the pictures of the items/animals, the image will change to an instrument and play that instrument sound. The images of the animals for The Mitten were taken from the free mask printables provided by the author Jan Brett.

I hope you and your students can enjoy these Scratch games. Again, you do not need a login to access Scratch. It is completely free. Simply share the link and they will have access to the game. 


The Cold Lady Who Swallowed Some Snow


Click for more Scratch games created by me.


Wednesday, October 21, 2020

Music Educators Coding With Scratch

Coding. Did I ever think I would be teaching myself how to code? Nope. But, here I am jumping down the rabbit hole. Who knew it would be something that would expand my skills as a music educator?

I elected to be a cloud teacher for the district through December. I am the sole elementary music educator for 1400 cloud students. So, all of my teaching must be delivered asynchronously. With this large amount of students, creating instrument kits was out of the question. So, I started searching the web for interactive music instruments to include in my virtual classroom. That is when I discovered Scratch.

Scratch is a website where anyone can program interactive games, stories, and animations. This is completely free and you do not have to log on to access the games. I first found interactive instruments that were created by others.  I featured them in my Virtual Classroom. You may click the image below to visit and take a peek.


I started including these instruments in lessons. I provided a link for the students to go to the virtual xylophone and try to play a song using their number keys. That seemed to be successful, but I wanted the students to be able to see the notation of the song and also play along to a track. So, I learned how to remix a Scratch project.

Scratch is also an interactive community where you can view projects created by others and also remix them. Remixing is a process of using someone else's project as a starting point and altering things to make a new project. For my first remix, I used a xylophone created by another user and added a new background and playing track. I have embedded it below. Click the space bar to begin the audio track. You can use the numbers or the letters to play the pitches, but it is easiest to use the numbers since they are in chromatic order. Our kindergarten through 2nd grade have touch screen Chromebooks. They would be able to touch the bars to play. The touch aspect would also work well on tablets or iPads.


After I got a taste of remixing, I had to learn more. My next projects used a guitar and strumming chord patterns. I used "Monster Mash" to get students in the mood for Halloween. For those students who do not celebrate, I offered an alternative-"Don't Worry Be Happy".  I learned how to animate using motion. The bat and bird fly over the correct chords. The characters also have speech bubbles which tell the strumming patterns and the upcoming chord. Both projects are embedded below. Click the green flags to begin. You can use your letter keys to strum the chords or you could click the letters with your mouse or touch screen.


For the next project, I decided to combine the two options to play harmony and melody. I used the song "Skin and Bones". Students can play the Dm chord by clicking the guitar or using their space bar. The glockenspiel can be used to play the "Oo-Oo-Oo-Ooo" phrase. They can click the bars or use the number keys. Click the green flag to begin the audio track.


I'm sure I'm not done creating Scratch projects. I'll try to keep you updated. If you click the link below, you can view all the projects I have created in Scratch.

Music With Mrs. Dennis on Scratch


If you are interested in learning how to code with Scratch, you can follow these Facebook Groups.

Teaching With Scratch


Scratch For Music Educators

Saturday, March 24, 2018

Instrument Family Races


Need an engaging activity to reinforce the instrument families? Need an emergency sub plan that can be used by a non-music sub? You should try this new resource--Instrument Family Races.
This resource includes 24 instrument cards, 2 game versions, and a video demo. You only need to provide 4 or 8 hula hoops.

I divide the class into 2 groups. Each team has 4 hula hoops to represent the 4 instrument families (string, woodwind, brass, percussion). The hoops will be on one side of the room. One student from each team will stand on the opposite side of the room from the hoops.


The teacher will have 2 stacks of instrument cards which are in identical orders. The teacher will draw the top card from each stack and reveal it to the players. Each player will grab their card and race to place it into the correct hula hoop family. The game will continue rotating new teammates each turn.


When all the cards have disappeared, you can play in reverse. The teacher will call out an instrument and the players will race to find the correct card and bring it back to the teacher. This will get the instrument cards back into two identical stacks ready for the next class to play the game.

This game is very engaging and can easily be managed by a non-music substitute teacher. I recently left this game with a sub along with this demo video and she had no trouble understanding the rules and procedures. Here is my demo video:


This game is available for download on my Teachers Pay Teachers Store. 
Just follow this link:

Sunday, March 26, 2017

31 Days of Rhythm: Teach Rhythm with Game Centers


Happy Music In Our Schools Month! I am teaming up, once again, with some fellow music ed bloggers for "31 Days of Rhythm". My first post on March 17th was about Rhythmic Popcorn. Today, I will be sharing ideas for teaching rhythm with game centers.

I began using centers about 3 years ago. Centers provide an opportunity for the class to be engaged in activities while I work with small groups. I use centers every time I have recorder playing tests or when I want to hear individuals sight read short rhythms or melodies on flash cards. I have also used centers to isolate a small group on ukulele and provide more feedback to individuals correcting hand positions and strumming technique. Centers are also great as emergency sub plans! Most substitute teachers have no background knowledge in music. Centers allow my students to reinforce music skills while I'm not there.

I have many posts about centers, but today I will briefly describe a few that make connections to rhythm.

#1) Over the Edge

"Over the Edge" is a game to reinforce rhythmic durations. It is a free printable from pianamation.com. Students each have a game board with a waterfall. They draw cards and place bingo chips or glass pebbles on their river to equal the number of beats of the note or rest. The object of the game is to be the last person who has not filled their card and fallen off the waterfall. My full post on Over the Edge can be found at this link.


#2) Rhythm Rockets

Rhythm Rockets are part of Artie Almeida's Music Proficiency Packs. This game tests students' ability to read and perform rhythms and their ability to recognize them aurally. Each student gets a rocket with identical rhythms. The official instructions may be different, but I'll describe what works best with my students. I have a small group sitting in a straight line. One student stands in front of them and chooses a rhythm from the rocket to perform for the group. They can either count it out loud using rhythmic syllables or perform it with body percussion. The students identify which rhythm the individual was performing by placing a clothes pin on the side of their rocket. Then, they must put their rocket on top of their head. This will allow the individual performing the rhythm to easily recognize who got the correct answer first. The winner will get to perform a rhythm for the group next. My full post describing Rhythm Rockets can be found here.


#3) Sneaky Snake

Sneaky Snake is another Music Proficiency Pack by Artie Almeida. This game requires students to recognize notation symbols such as notes, rests, clefs, bar lines, etc. I have found this game works best in pairs. The symbols appear on one side of the paper while the written name appears on the back. There are holes in the cardstock beside each symbol. Partners sit facing each other holding the snake page between them. One partner calls out a symbol and the other partner must identify it by sticking a straw in the corresponding hole. My full post describing Sneaky Snakes can be found here.


 #4 Beat Strips

Beat Strips are another Music Proficiency Pack from Artie Almeida. They provide opportunities for students to compose 4 beat patterns using quarter notes, eighth note pairs, and quarter rests. This can be done to freely compose and perform for a partner. This could also be a dictation game. One individual could perform a rhythm from a list you provide and the group would have to notate it on their beat strips. My full post describing Beat Strips can be found here.


#5) Connect 4

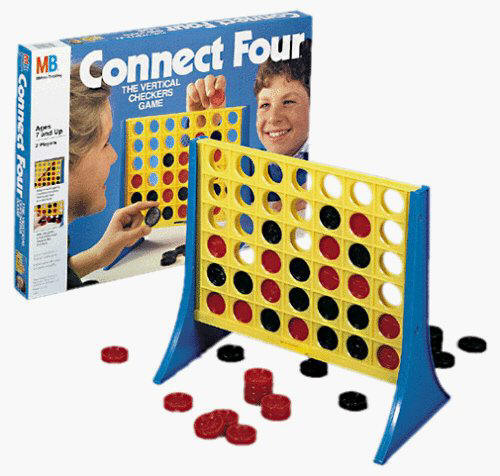
Recycle that old board game and turn it into a music center! The classic version of Connect 4 is a fun game to compose with simple quarter notes and quarter rests. The red checkers could represent notes while the black checkers represent rests. This would be great for kindergarteners. To challenge older students, I found this Connect 4x4 game at a yard sale. It features 4 colors of checkers which could represent different instruments. In the picture below you can see construction paper squares that helped the kids remember which color they should play. It also has checkers with holes in the middle which could represent rests. The full post describing Connect 4 can be found at this link.


Thank you for visiting my blog for 31 Days of Rhythm. If you would like to read more posts from this event, you may visit Facebook and follow the MusicEd Blogs page.


Saturday, September 19, 2015

Classroom Management During Game Songs


Do you ever have discipline problems with game songs? Children quickly lose patience while waiting for everyone to have a turn. It is especially difficult in elimination games when kids get eliminated early and have a longer time to wait. Over the years, I've developed some tricks to help these activities go much more smoothly.

First of all, I think it is important for your students to understand that sometimes we don't all get a turn. Class time is short and sometimes we must move on to another activity. Children need to learn how to deal with disappointment. But, most of the time, I try to allow everyone to have a turn without the activity taking up too much lesson time or encountering too many discipline problems. Here are some tips avoid chaos while still allowing everyone to have a turn.


How Will I Know When Everyone Has Had a Turn?

In most games, I rely on the students' honesty. They know they cannot have a second turn being "It". If they get tapped as "It" and have already had a turn, they just shake their head "no" so the tagger can move on to someone else. If the taggers are having a hard time remembering who has had a turn, the students who still need a turn raise their hand.

It is easier to tell who still needs a turn in an elimination game. In games like "Bounce High, Bounce Low" students do not have to leave the circle to be eliminated. Those who have had a turn simply sit in their place; those who have not had a turn remain standing. In passing games, like "Acka Backa", students must be removed from the circle as they are eliminated. This can create some discipline issues if you do not have a plan for those students. I will give you some ideas for those situations below.


How Do I Make The Game Go Faster?

Make Smaller Groups
Depending on the game and your space, it may be possible to create two small groups that play the game simultaneously. This will speed up the game and allow everyone to have a turn. For a chasing game, like "Charlie Over the Ocean" or "Cut the Cake", make sure the running paths would not collide with each other. 

Make More "Its"
Sometimes it is possible to increase the number of people that are "it". I do this often in games like "Bluebird, Bluebird, Through My Window". I have up to four or five students weaving in and out at once and tapping a new friend on the shoulder to trade places. If it is a passing game, you could have more than one item passed around the circle simultaneously. Either of these modifications would make the game go much quicker.


How Do I Keep Students From Getting Bored?

Instrumental Accompaniments
With fourth or fifth grade, sometimes I allow students to move to the xylophones to accompany our game after they have had a turn. I can trust that they would be using the instruments appropriately and wouldn't need too much supervision or conducting. If it is a simple accompaniment, like a broken Bordun, the students would not need any preparation except some verbal instructions. For more complicated parts, I have the entire class learn the parts on the barred instruments before returning to the carpet to begin the game or dance. 

Younger grades would need more supervision at the instruments, So, instead of using all my barred instruments, sometimes I use only one or two bass bars or just 2-4 barred instruments. I can supervise the small group much more easily. I've also had a small group reading notation on the board performing sol-mi songs on Boomwhackers. You could also have them perform a short rhythmic ostinato with unpitched percussion. This is a great opportunity for a performance assessment! After their turn playing they may return to the group but cannot be chosen as "it" anymore. If it is an elimination game, they sit to the side of the carpet and wait. 

Body Percussion
During elimination games, sometimes I have students create new body percussion patterns. Second and third grade love this the most! I have one student stand in front of the eliminated group. They create a four-beat body percussion ostinato and the rest of the students copy them.  

Interesting Props
A Slinky can be used to keep a steady beat.  Hold one end in each hand to make it look like rainbow. Transfer the weight back and forth to the beat. You can also open and close the Slinky with vertical, horizontal, or diagonal motions. An Original Slinky made of metal also creates a very pleasant sound!  I really want to get a class set of Slinkies, but they can be costly. Cheaper plastic springs just don't have the same weight or feel and wouldn't make as pleasant of a sound. I've even found the miniature ones by Slinky brand in the Target dollar section, but they just don't have enough weight to move to a slower tempo. Even if you only have a few Slinkies, students can take turns using them to keep a steady beat. 

Beanbags can also be transferred from hand to hand to make steady beat.  My beanbags are homemade. My mother helped me make them during my first year teaching. We used plastic pellets made for adding weight to stuffed animals. The make a pleasant sound, although it is much quieter than a Slinky. (The quietness may actually be a good thing!) I asked students to hold their hands with palms up and to flatten the beanbag like a pancake. They then flip the pancake from one hand to another trying to match the steady beat.  My daughter and I are demonstrating this activity in the short video below.


Both my second graders and kindergarteners used the beanbags this week to keep a steady beat when they were eliminate from a game. They all enjoyed using these props. We practiced the pancake flipping as a class and then I collected the bean bags in the bucket before the game started. As they got eliminated, they would get a beanbag from the bucket and sit on the edge of the carpet away from the game circle. Some students wanted to throw the bean bags, but I warned them that they would lose their bean bag if they were not using it properly. If you don't have a set of beanbags, I bet your gym teacher may have some you can borrow!

In my Level III Orff course, another teacher brought in tennis balls. She had made a small slit in the balls, filled them with a small amount of BB pellets, and used hot glue to seal the hole back. We used the balls similarly to the beanbag and passed it from hand to hand, around our backs, and under our legs. We also tossed them gently in the air and would catch them to the steady beat. This would be a great activity to challenge older students. The teacher said she had a connections with a local gym and got all her tennis balls donated! You never know what you may be able to get until you ask!

Variations
Repeating anything the same way over and over would make anyone bored. So, why not change it up? Vary the tempo or change up the voice. With kindergarten, we reinforced the types of voices while practicing a steady beat. The class stood in a circle and passed a ball while saying the "Acka Backa Soda Cracker" poem. As a student got eliminated, they would go to a music stand and draw a voice card (either speaking, whisper, calling, or singing). We would use that voice to perform the poem the next round. After they drew a card, they got a beanbag to do pancake flips. This activity was very successful with minimal behavior disruptions. The students loved changing their voices, drawing a card, and mixing up the cards for the next student.  My free printable voice cards are featured in a previous blog post. 


Coda
 Children learn best when they're engaged in play. Game songs are a great way to get all children actively making music whether by singing or playing an instrument. I hope some of these tips help reduce your frustration and eliminate some discipline issues which may occur during games. Now that you have some tricks and strategies for these activities, what are your favorite game songs? Comment below, or add a link to share your favorite game songs with others!

Join the Link-Up Party! Add a link to your favorite game song activity or game song resource book!
  

Friday, February 20, 2015

Over The Edge: Music Game Assessing Rhythmic Durations

I've been including more centers in my classroom this year in order to allow me time to assess students in small groups. Most frequently, I use centers during 4th grade recorder playing tests, but have used centers at some point for all grade levels. If you have missed my previous posts on music centers, follow this link.

Many centers I have created myself, but I have also found some amazing printable centers shared by other music teachers. Jennifer Fink, at Pianimation.com has several resources for music educators available to download and print for FREE! Thank you, Jennifer! Follow this link to find a complete list of her resources. I have previously posted about her game "Alphabet Path" used to reinforce the order of the musical alphabet.

Today, I will be sharing another game from Jennifer called "Over the Edge". This game reinforces note and rest values.

www.pianimation.com


Students each have their own game board with a river and rocks. They take turns drawing cards which display a note or rest. They determine the beat value of the note or rest and place that number of glass beads on their river. If a player fills up all the rocks in their river and fall off the waterfall, they are eliminated from the game. The original rules allowed students to say "Pass" if they were getting close to the edge and the winner would be the person closest to the waterfall without going off.


I modified the rules to make it easier for a variety of ages. I did not allow students to pass and told them the last person to fall off the edge is the winner. In the picture above, you will see an additional instruction sheet that I created with these modified directions and with a beat value chart for the notes and rests. You can also see that I substituted Bingo chips instead of glass beads. I have an abundance of bingo chips and didn't feel like purchasing glass beads specifically for this game. I also printed the game on cardstock and laminated for durability.


FREE DOWNLOADS

If you think your students would like this game, follow this link to
download "Over the Edge" from pianamation.com.

Follow this link to download my modified instruction sheet to accompany Over the Edge.

Monday, February 16, 2015

"Fishing For Pitches" Music Center

All summer, I scavenged yard sales, Goodwill, consignment shops, and peddler
malls for board games that could be converted into music centers. On my list was the classic battery powered fishing game called Let's Go Fishin'. While I never found that particular version of the game, there are several licensed adaptions.


I happened to find two games from the Disney movie Cars. One was at a Peddler's mall and one was at a consignment shop. I paid less than $3 for each of them. Instead of fish, this version of the game has the player fishing for tires.


First, I labeled the bottom of the fish with the letters of the musical alphabet (ABCDEFG). Since there are 21 fish/tires in each game, it worked out nicely that there would be 3 of each pitch. Since my tires were black, I printed letters on mailing labels. If you acquire the actual fishing game, a black Sharpie would work perfectly fine.


One game I purchased was missing the fishing poles, so I created new poles using pipe cleaners and straws. Actually, the strings from the original game tangle so easily, I also replaced those with straw and pipe cleaners poles.

Fishing For Pitches

For 2-3 players

Objective: Be the first player to catch a fish matching the pitch of  a note on the staff.

1) Draw a card to select a note on the staff.
2) All players race to fish and catch the name of the pitch.
3) The first player to catch the correct pitch is the winner.


I also created a more advanced version of the game . . .

Fishing For Chords

For 2-3 players:

Objective: Be the first player to catch 3 fish spelling the chord on the staff.

1) Draw a card to select a chord on the staff.
2) All players race to fish and catch the three pitches names.
3) The first player to catch three fish which spell the chord on the card is the winner.


The cards for both versions of the game are available for download on my Teachers Pay Teachers store. It is best to print double-sided on cardstock and laminate for durability. The games are available to download separately or as a discounted combo pack.


Saturday, January 17, 2015

Guess Who: Music Instruments


I have planned lots of new music centers for this year and my students have really enjoyed them. I will be blogging more about the centers soon. This first post will be about a modified version of the classic Guess Who.

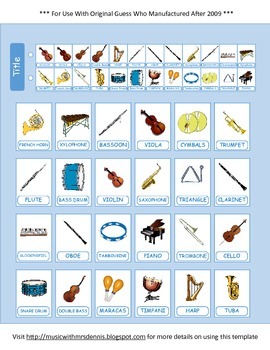
I scavenged yard sales, consignment shops, and Goodwill all summer on the look out for games that could be modified for music centers. I found two of these electronic Guess Who games for dirt cheap. This version is technically called Guess Who Extra and features 3 rows with 8 windows in each row. One was at Goodwill for $1.50. The other was at a children's consignment shop for $2.50. Over the summer, I saw a pin on Pinterest where someone modified Guess Who to reinforce US presidents and other historical figures. When I saw these versions, I immediately thought of a musical adaptation. This would be a great way to compare and contrast music instruments.

Object
Guess your opponent's mystery instrument before they guess yours.

How To Play
1) Each player slides the plastic window over to secretly select a musical instrument.
2) Players open all the doors to reveal the instruments.
3) Players take turns asking "yes" and "no" questions to help them narrow down the choices of instruments.
 4) Players only have one chance to guess the specific name of the instrument. If they guess wrong, their opponent wins.

I also included an Instrument Fact Sheet to assist students when asking and answering questions.
Before beginning the center rotations, I demonstrate each game. I shared many examples of questions with the students and they took turns asking questions to discover a mystery instrument I selected.
Some example questions included:
Does your instrument belong to the percussion family? (string? woodwind? brass?)
Is your instrument made of wood? (metal? plastic?)
Does your instrument make a pitch?
Do you play your instrument with both hands?
Do you use your mouth to play your instrument?
Could your instrument fit into a backpack?
Does your instrument have a reed?


I also created a game board using the classic version of Guess Who which features 4 rows with 6 windows in each row. This version was manufactured in 2009 or later.  


Both versions of the game are included in one PDF file and are available for download in my TeachersPayTeachers Store. I suggest printing in color on cardstock and laminating for extra protection.


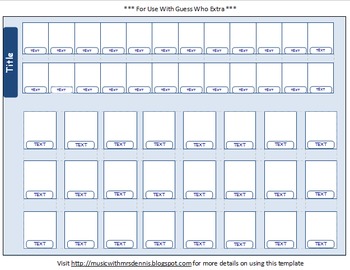
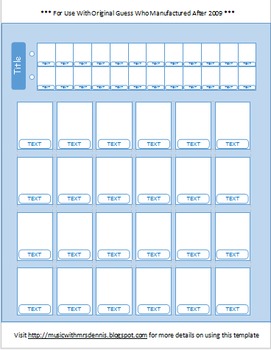
 Do you have another idea for a Guess Who game? I have blank templates available so that you do not have to do all the precise measuring. All you have to do is fill in the boxes with text and pics. Both templates are available to download and edit using Microsoft Publisher.


I know your students will have fun using Guess Who to learn about instruments and other content. Keep your eyes open at second-hand stores and you can snag the games for super cheap. You may even get some donations by sending out a request to parents. Good luck on your hunt!


Saturday, October 18, 2014

Music Centers Assessing the Treble Clef Staff


I have previous posts on how I use centers in my music room. You may click this link to read those posts.  
I recently planned a lesson for 4th and 5th grade classes to review the pitches of the treble clef staff using centers. My class periods are 50 minutes. So, we planned for 10 minutes or so to explain the centers and then each group would have about 10 minutes to rotate at each of the four centers.

Giant Staff Twister

 In one center, students played Twister using the giant floor staff. I used gym tape to create the staff lines on my floor and used the existing 12 inch tiles to keep my lines perfectly parallel. I have one spinner with the letters of the lines of spaces and one spinner to determine which body part should touch the correct line or space. The spinners are available on my teacher pay teacher store. I introduced Giant Staff Twister last year and it has become a favorite for the students.

Treble Toss


Many people who have blogged about the giant floor staff have had students try to toss bean bags on a specific line or space. Here in Kentucky, cornhole has become a very popular backyard game and I knew my students would love the challenge of tossing a bean bag through a hole. So, I used 2 trifold display boards (like you would use to display science fair projects) and created a staff with holes on the lines and spaces. Students would draw a popsicle stick to randomly select a pitch letter. Then, they had 3 chances to toss their beanbag into the correct hole. After their turn tossing beanbags at the spaces board, they would get in the back of the line for the lines board.
This game was a hit! To set up the boards, I borrowed a couple spare student desks from our furniture storage room. One flap rested on the top of the desk and I set a heavy object (a chromatic glockenspiel) on top of the cardboard. You could use a few heavy books or whatever items you want. The bottom flap would rest against the legs of the desk and caused the board to be slightly tilted which helped stabilize the board when the beanbags were tossed. The boards fold flat and lay horizontal in my cabinets, so it will be easy to pull these out and use them again in the future.

Staff Wars


The third center involved the Activboard. I downloaded Staff Wars from The Music Interactive. This is a free download for your pc. They have a new app version which is only 99 cents. The object of the game is to click the correct letter name of each note as it scrolls across the staff. The game gradually gets faster and more difficult. You can select the clef of your choice and also adjust the range of the  notes it will give the students. The students LOVED this game! There are also several other free music games available on themusicinteractive.com. I look forward to downloading some more and trying them out.

Exit Slip and Flashcards

The fourth center involved an exit slip assessment which would be graded. The exit slip had students identifying letter names of some notes on the staff. The students were also asked to practice drawing a treble clef. The exit slips can be downloaded on my teachers-pay-teachers store


As the students finished, they got to quiz each other with flash cards until it was time for the next rotation. The flash cards were a free download from Making Music Fun! The cards are one sided, so I added the letter names on the back so the kids could quiz each other. I printed these on cardstock so they would be more durable.


 I know your students will enjoy these games as much as mine did! Enjoy!

Sunday, December 15, 2013

Blubbr Vs. eduCanon: Creating Online Video Quizzes


I have recently been introduced to two websites that allow you to create quizzes using videos on YouTube or other websites. I have explored both sites and would like to share my observations to assist you in selecting a tool for your classroom.


I created an easy infographic above, but will give a more detailed explanation below.


Video Selection

If you want to combine clips from more than one video, Blubbr is the choice for you. You can only select one video for each quiz with eduCanon.

If you want to show more than 19 seconds of the video before inserting a question, eduCanon is the choice for you. But, with eduCanon, you have to show the video in its entirety. You cannot trim the video or skip to a specific time marking. With Blubbr, you can select any clip (up to 19 seconds) from any part of the video.


Creating Questions/Answers

Blubbr has a minimum of 5 questions and you MUST create a 4 option multiple choice question. EduCanon has no limitations or minimum requirements on questions. With eduCanon, you can create 2 or more multiple choice selections for each question.

EduCanon also allows for more customization offering different font choices, bold, italics, font color, font size. You can even insert pictures or charts into the question.

Below is a screenshot while editing in Blubbr:

Below is a screenshot while editing in eduCanon:

Scoring/Tracking

Blubbr times the questions and gives you 20 seconds to answer each question and you are rewarded more points for answering more quickly. You are shown a score at the end of the quiz, but individual scores are not reported to the quiz creator or teacher.

EduCanon gives the student unlimited time to answer the question. If the video is shared publicly, there is no score tracking. However, if students create usernames, the teacher can assign specific videos to students and get a report of their individual scores.

Viewing the Quiz

When each question appears on Blubbr, you cannot see the video anymore. You can see colored dots at the top of the screen tracking your progress in the quiz.  They change green if you answer correctly and red if you answer incorrectly. The student has the option to skip the video clip and advance directly to the question if they wish. Below are two screenshots showing the video screen and then the question screen:


EduCanon questions appear to the left side of the video screen and you can still view the paused video. You can view the timeline on the bottom to show your progress in the quiz. Little question marks are used to show the student where the upcoming questions will appear. You are not allowed to skip ahead and advance the video. Below is a screenshot of the quiz:


Sharing

When you share a video publicly on eduCanon, a user will still need a URL link to view your quiz. Teachers can also assign videos to their students so they will automatically appear when they log in. At this time, EduCanon does not have a way to search for videos created by others.

If you post a video on Blubbr, it is automatically made public. There is no option to keep a video private. Blubbr has developed a great database to search for videos by title, keywords, or even category. When creating a video, you can pick up to 2 categories (Music and Education are available options) and you can also list many keywords. The education category is the largest and has more than 3000 trivs. Music is the second largest with over 1,300 trivs. Click here for a link to browse Blubbr categories.

Both sites allow you to share by URL or embed the quizzes into a website using html code.


Implementation

I decided to use Blubbr to create a video quiz for my Nutcracker unit. I really liked the freedom of eduCanon to insert questions wherever you would like, but I ended up choosing Blubbr because I could not show the full ballet and needed to be able to trim selections. Ideally, I would love a combination of these two sites which would allow me to use clips from multiple videos, but show video clips at least 30-45 seconds long. In the future, I will probably use both of these sites and evaluate the needs of each project before selecting the right tool.
Click below for links to my Nutcracker Blubbr Trivia!

Friday, December 13, 2013

Music Centers

During the week of Thanksgiving Break, I didn't want to start a lesson or unit when I wouldn't see all the classes of the week. So, we experimented with music centers. I have 50 minute classes, so I chose 4 centers. It took about 10 minutes to explain the games and then students travelled in groups and had about 10 minutes at each center. They seemed to enjoy them, so I will definitely try this again later in the year with all the classes. Once the kids have tried the centers, they would be great for emergency sub plans!

Giant Staff Twister


In a previous post, I shared the activity where we did relay races with our giant floor staff. Jen Fink, at pianamation.com, has used the floor staff to play a modified game of Twister. She created cards you can use for the game, one deck contains body parts (hands and feet) and one deck contains lines and spaces and they are available to print from her blog. We decided to make the game like traditional Twister and create spinners. The spinners are available on my teacher-pay-teacher store.


Boomwhacker Center


In the Boomwhacker center, students practiced note reading. They took turns playing songs from the book "Whack-a-Doodle-Doo!" I have 2 copies of this very affordable book ($5.95 from westmusic.com) One student would attempt to play a song. The next student in line would be able to flip through the extra book to select the song they would like to perform for their turn. This book includes colored notation made it easy for the older students to perform the songs. The younger students needed assistance, so my student teacher positioned herself at that center.

Connect 4 Composition

The younger grades used a Connect 4 game for rhythmic composition. They took turns filling the bottom row with checkers.  The red checkers represented a sound and the black checkers represented a rest. The students performed the rhythms on lollipop drums. Unfortunately, I did not get a picture of the younger students in action at this center.
For the older students, I used a more advanced game, Connect 4 x 4, with 4 different colors--red, yellow, green, and blue. I selected a few unpitched percussion instruments and the students would decide which instruments would play for each color. The students took turns creating new compositions and experimenting with different timbres at the same time. This version of the game has full and empty checkers. I forsee these representing quarter notes and half notes at some point in the future. (Connect 4 x 4 can be found on walmart.com for $19.86)


Technology Center

The technology center used the Interactive whiteboard and the iPad. On the Activboard, the students took turns on a game from nyphilkids.org. The game pictured below is "Music Match Instruments" which is a memory-type card game. I have also collected links to many other music sites and they can be found at this link.


They students could also play a music game on the iPad. Make sure you check out a previous post sharing 110 free music apps for the iPad. Kindergarten and 1st grade were playing rhythms on Monkey Drum. 2nd and 3rd grade were reading rhythms on Rhythm Cat. 4th and 5th grade were testing out a new app Cookie Beats. Look for a review of this app coming soon!


I have dedicated an entire Pinterest board to 
Check it out for more great ideas!