Showing posts with label printable. Show all posts

Saturday, March 24, 2018

Instrument Family Races


Need an engaging activity to reinforce the instrument families? Need an emergency sub plan that can be used by a non-music sub? You should try this new resource--Instrument Family Races.
This resource includes 24 instrument cards, 2 game versions, and a video demo. You only need to provide 4 or 8 hula hoops.

I divide the class into 2 groups. Each team has 4 hula hoops to represent the 4 instrument families (string, woodwind, brass, percussion). The hoops will be on one side of the room. One student from each team will stand on the opposite side of the room from the hoops.


The teacher will have 2 stacks of instrument cards which are in identical orders. The teacher will draw the top card from each stack and reveal it to the players. Each player will grab their card and race to place it into the correct hula hoop family. The game will continue rotating new teammates each turn.


When all the cards have disappeared, you can play in reverse. The teacher will call out an instrument and the players will race to find the correct card and bring it back to the teacher. This will get the instrument cards back into two identical stacks ready for the next class to play the game.

This game is very engaging and can easily be managed by a non-music substitute teacher. I recently left this game with a sub along with this demo video and she had no trouble understanding the rules and procedures. Here is my demo video:


This game is available for download on my Teachers Pay Teachers Store. 
Just follow this link:

Wednesday, August 30, 2017

Welcome Back, Class: A Review Unit


To start the year, I plan a unit that will review many musical elements and dust off the vocabulary they may have forgotten over summer. This is a 3-lesson unit for 4th grade which will get the students playing rhythms, singing a melody, playing harmony, improvising, and composing. Here is an overview:

Lesson 1:

I begin the unit with body percussion, including patting, clapping, rubbing, and stomping. We review rhythmic durations by viewing the notation on the board including quarter note, half note, eighth note pairs, and quarter rest. I review dynamics by adding a crescendo on the 3rd phrase. We review the element form and perform the poem in a 2 part round with voices and body percussion. Then, we review timbre and add hand drums.

Lesson 2:


The Remix!!! We review the poem and discuss the musical elements. We discover we were missing melody and harmony in our previous lesson. We echo solfege and review the lines and spaces on the staff. We perform the melody on Orff instruments. We add a broken bordun for harmony. I have the students echo a rhythmic phrase "Fourth Grade Rocks!" They improvise with that phrase twice. I give them parameters for their improvisation. The first phrase CANNOT end on do (C). The second phrase HAS to end on do (C). We perform the improvisations in small groups: 1) glockenspiels; 2) alto/soprano xylophones; 3) metallophones, 4) basses. Our final performance is ABA form with the improv sandwiched between the song.


Lesson 3:

We compose! The students match school subjects with the correct rhythmic building block. I ask them to create a phrase using 8 books. I give them some parameters for composing. I ask that the last book be a rhythm with quarter note and quarter rest. I also ask that the phrases begin with the same 2 books. (Books 1 and 5 should be identical and books 2 and 6 should be identical). The students first get in small groups and use manipulatives to compose. Using manipulatives first saves the erasers on my pencils!!! When the group can perform the poem both verbally and with body percussion, they are given a worksheet to notate their patterns. When everyone is finished with their worksheet, we do a final performance in rondo form sharing the book compositions. We alternate the "Welcome back, Class" poem with each individual group.


This unit is always great fun! After only 3 lessons, I can say my students have used body percussion, played drums, played xylophones, used expressive speech, used their singing voice, performed in round, with ABA form, and rondo form, improvised melodically, and composed rhythms! It is a great way to start the year!


If you are interested in teaching this unit, you can search my TpT store for full lesson plans, PowerPoints, printable worksheets, and manipulatives.


Tuesday, August 22, 2017

Hand Drum Labels


I am very fortune to have several sets of hand drums. They come in sets with 5 different sizes that nest together. As I have acquired more drums, I realized I needed an easy system to group the drums back in their families.

I have one set of hand drums from Periopole which are color coded by size. I liked this system and thought for one moment what it would take to paint the drums. But, I opted for color-coded labels. Each size is assigned a color and number.

8" drum = #1 Purple
10" drum = #2 Blue
12" drum = #3 Green
14" drum = #4 Yellow
16" drum = #5 Red

Each family was assigned a letter which precedes the number. So, a drum labeled D3 would be a 12" drum with a green label and nest with the other D drums.

The labels are printed on standard mailing labels measuring 1" by 2 5/8". I borrowed some clear book tape from my librarian to add an extra layer of protection from peeling.

I'm very happy with this project and the kids were excited to see the fancy labels. No one has dared try to peel the tape off yet! They saw my face and knew I was serious about losing their drum if I saw them destroying my new labels! If you would like to use these labels in your classroom, I have the file uploaded to my Teachers Pay Teachers store. The link is below. Happy drumming!


Sunday, August 21, 2016

Orff Organization


I have had my Orff instruments labeled for many years, but students are often confused with the names. If I ask for alto xylophones to raise their hands, alto metallophones often raise their hands as well. They see the first word "alto" is the same and don't bother reading the second word. Kids are lazy! I am tired of correcting this mistake, so I made some new labels to help prevent confusion and to integrate some color theory! (I am also responsible for teaching visual art.)


I have created labels that are color-coded. All instruments with wooden bars are assigned a warm color (red, orange, yellow, or pink). All instruments with metal bars are assigned a cool color (blues, greens, and purples). Now, when asking for certain instruments or groups, I can call out a specific color or a color family. There are large labels that I placed on the front of the instruments and smaller labels that are on the edge of the instruments near the mallet holes.

I also created a chart to show our entire instrumentarium from highest to lowest pitch. You see the soprano metallophone and soprano xylophone posters side-by-side because they have the same range of pitches. The alto and bass xylophones and metallophones are also at the same levels. (We do not yet have a bass metallophone, but I put it on the chart anyway because I have high hopes to acquire one soon!) The posters feature a picture of the instrument, the type of bars it has, and the relative pitch level.

Before we move from the carpet to the instruments, I always review our procedures to keep the students and instruments safe. I also review proper playing technique. I decided to create posters of these rules to help our visual learners. There are 6 rules: 1) Step Around, 2) Lift With 2 Hands, 3) Aim For the Center, 4) Alternate, 5) Bounce Your Mallets, 6) Wait For the Teacher.


My students recognized the new labels and posters right away and they seem to be a great reference during class. If you think these labels will help your students as well, you may find them on my Teachers Pay Teachers store.


Wednesday, July 1, 2015

July 1st Music Freedom Freebie!

I have joined in with several other music teachers to offer some fabulous resources for free today only! My resource is a pdf file presenting the poem "Cobbler, Cobbler" along with a printable worksheet for students to compose using rhythmic building blocks.


Follow this link to find my freebie:
https://www.teacherspayteachers.com/Product/July1stMusicFreedomFreebie-Cobbler-Cobbler-1933942

Follow this link to view all July 1st Music Freedom Freebies:
https://www.teacherspayteachers.com/Browse/Search:july1stmusicfreedomfreebie

Friday, February 20, 2015

Over The Edge: Music Game Assessing Rhythmic Durations

I've been including more centers in my classroom this year in order to allow me time to assess students in small groups. Most frequently, I use centers during 4th grade recorder playing tests, but have used centers at some point for all grade levels. If you have missed my previous posts on music centers, follow this link.

Many centers I have created myself, but I have also found some amazing printable centers shared by other music teachers. Jennifer Fink, at Pianimation.com has several resources for music educators available to download and print for FREE! Thank you, Jennifer! Follow this link to find a complete list of her resources. I have previously posted about her game "Alphabet Path" used to reinforce the order of the musical alphabet.

Today, I will be sharing another game from Jennifer called "Over the Edge". This game reinforces note and rest values.

www.pianimation.com


Students each have their own game board with a river and rocks. They take turns drawing cards which display a note or rest. They determine the beat value of the note or rest and place that number of glass beads on their river. If a player fills up all the rocks in their river and fall off the waterfall, they are eliminated from the game. The original rules allowed students to say "Pass" if they were getting close to the edge and the winner would be the person closest to the waterfall without going off.


I modified the rules to make it easier for a variety of ages. I did not allow students to pass and told them the last person to fall off the edge is the winner. In the picture above, you will see an additional instruction sheet that I created with these modified directions and with a beat value chart for the notes and rests. You can also see that I substituted Bingo chips instead of glass beads. I have an abundance of bingo chips and didn't feel like purchasing glass beads specifically for this game. I also printed the game on cardstock and laminated for durability.


FREE DOWNLOADS

If you think your students would like this game, follow this link to
download "Over the Edge" from pianamation.com.

Follow this link to download my modified instruction sheet to accompany Over the Edge.

Monday, February 16, 2015

"Fishing For Pitches" Music Center

All summer, I scavenged yard sales, Goodwill, consignment shops, and peddler
malls for board games that could be converted into music centers. On my list was the classic battery powered fishing game called Let's Go Fishin'. While I never found that particular version of the game, there are several licensed adaptions.


I happened to find two games from the Disney movie Cars. One was at a Peddler's mall and one was at a consignment shop. I paid less than $3 for each of them. Instead of fish, this version of the game has the player fishing for tires.


First, I labeled the bottom of the fish with the letters of the musical alphabet (ABCDEFG). Since there are 21 fish/tires in each game, it worked out nicely that there would be 3 of each pitch. Since my tires were black, I printed letters on mailing labels. If you acquire the actual fishing game, a black Sharpie would work perfectly fine.


One game I purchased was missing the fishing poles, so I created new poles using pipe cleaners and straws. Actually, the strings from the original game tangle so easily, I also replaced those with straw and pipe cleaners poles.

Fishing For Pitches

For 2-3 players

Objective: Be the first player to catch a fish matching the pitch of  a note on the staff.

1) Draw a card to select a note on the staff.
2) All players race to fish and catch the name of the pitch.
3) The first player to catch the correct pitch is the winner.


I also created a more advanced version of the game . . .

Fishing For Chords

For 2-3 players:

Objective: Be the first player to catch 3 fish spelling the chord on the staff.

1) Draw a card to select a chord on the staff.
2) All players race to fish and catch the three pitches names.
3) The first player to catch three fish which spell the chord on the card is the winner.


The cards for both versions of the game are available for download on my Teachers Pay Teachers store. It is best to print double-sided on cardstock and laminate for durability. The games are available to download separately or as a discounted combo pack.


Saturday, January 31, 2015

Snowman Chords and "Let It Go"


Do you still have Frozen Fever? Most of my students, and some teachers, are still obsessed with Frozen!  (Theresa, I'm calling you out!) I saw a post by Dyan Robson using snowmen to build chords on a staff. I immediately saw an opportunity to teach a lesson using music from the movie Frozen. Her blog post can be found at this link.


A snowman is the perfect visual for a triad chord in root position. I created an interactive door display to get students excited about the lesson. I reused some decorations from my daughter's Frozen-themed birthday party. I traced Olaf onto a poster board using the projector and painted his outline. (At the party, he was used for a game of "Pin the Nose On Olaf".) The door engages the students to learn about the chords. They can quiz themselves to match the letter names to the snowman chords. They lift the flaps to check their answers.


I taught the chord lesson to my 5th graders. They reviewed note names by labeling the chords.
We reviewed the concept of major and minor by listening to some chords used in the song "Let It Go." The students played the chords on Boomwhackers, but I also played the chords on the piano to make it easier for them to hear. Even though I displayed the chords in root position, I added octavator caps to A flats, B flats, and B naturals.


The students were seated in a horseshoe shape and I distributed the Boomwhackers in order chromatically. The students were responsible for looking for their pitch name. Those students with chromatic Boomwhackers knew to look for both sharp and flat equivalencies. We practiced the chord progressions and then played along with "Let It Go" via a YouTube video.


I had to remind the students not to sing along unless they already had the song memorized. Often they would be busy trying to read the lyrics and missed their turn to play the harmony.

At the end of class, students completed an exit slip naming the pitches of some snowman chords.


My interactive flipchart is available for download on Promethean Planet. If you do not have an Activboard, the still images from those slides are available on Teachers Pay Teachers and included in a combo pack with the bulletin board printables and exit slip assessment.

Saturday, January 17, 2015

Guess Who: Music Instruments


I have planned lots of new music centers for this year and my students have really enjoyed them. I will be blogging more about the centers soon. This first post will be about a modified version of the classic Guess Who.

I scavenged yard sales, consignment shops, and Goodwill all summer on the look out for games that could be modified for music centers. I found two of these electronic Guess Who games for dirt cheap. This version is technically called Guess Who Extra and features 3 rows with 8 windows in each row. One was at Goodwill for $1.50. The other was at a children's consignment shop for $2.50. Over the summer, I saw a pin on Pinterest where someone modified Guess Who to reinforce US presidents and other historical figures. When I saw these versions, I immediately thought of a musical adaptation. This would be a great way to compare and contrast music instruments.

Object
Guess your opponent's mystery instrument before they guess yours.

How To Play
1) Each player slides the plastic window over to secretly select a musical instrument.
2) Players open all the doors to reveal the instruments.
3) Players take turns asking "yes" and "no" questions to help them narrow down the choices of instruments.
 4) Players only have one chance to guess the specific name of the instrument. If they guess wrong, their opponent wins.

I also included an Instrument Fact Sheet to assist students when asking and answering questions.
Before beginning the center rotations, I demonstrate each game. I shared many examples of questions with the students and they took turns asking questions to discover a mystery instrument I selected.
Some example questions included:
Does your instrument belong to the percussion family? (string? woodwind? brass?)
Is your instrument made of wood? (metal? plastic?)
Does your instrument make a pitch?
Do you play your instrument with both hands?
Do you use your mouth to play your instrument?
Could your instrument fit into a backpack?
Does your instrument have a reed?


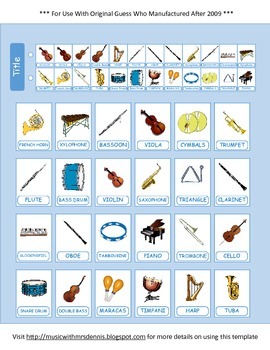
I also created a game board using the classic version of Guess Who which features 4 rows with 6 windows in each row. This version was manufactured in 2009 or later.  


Both versions of the game are included in one PDF file and are available for download in my TeachersPayTeachers Store. I suggest printing in color on cardstock and laminating for extra protection.


 Do you have another idea for a Guess Who game? I have blank templates available so that you do not have to do all the precise measuring. All you have to do is fill in the boxes with text and pics. Both templates are available to download and edit using Microsoft Publisher.


I know your students will have fun using Guess Who to learn about instruments and other content. Keep your eyes open at second-hand stores and you can snag the games for super cheap. You may even get some donations by sending out a request to parents. Good luck on your hunt!


Wednesday, October 22, 2014

Recorder Playing Tests


Several people have asked on music teacher Facebook groups how others handle playing tests for recorders. Here is an overview of how I assess recorders . . .

Procedures


I teach recorder in 4th grade. For each unit, I provide at least 3 songs with varying difficulty. (Buzzword: DIFFERENTIATION!) I don't follow any particular recorder method book. I have gathered songs from several books, from my Orff levels courses, and from various workshops and conferences over the years. Lessons in the unit may also involve games, dancing, or playing accompaniments to the songs on barred instruments.

At the end of the unit, I hear each student perform one of the songs for a playing test. On test day, the students rotate in centers. My classes are 50 minutes long. I try to allow 10 minutes at each station. That leaves 10 minutes for instructions at the beginning of class and maybe a couple minutes of clean-up before they line up to leave.

One center is the playing test where I am stationed. I hear each student in the group perform a song and then I tie their strings before they rotate to the next center. I used to hear students one at a time and it took a long time for students to come back to me and then go back to their seat. Many times, students would be very nervous playing for me it would take forever to get them to even begin their song. In small groups, it seems less formal and the students are also very supportive of each other. While I'm formally assessing them on the rubric, they are watching their peers and offering suggestions like--"Your thumb hole wasn't covered all the way." and "You didn't have your right thumb kickstand."


Before they play for me, there is a center with an exit slip or short quiz assessing any new vocabulary or concepts we learned in the unit. These students have finished their written assessment and are working in small groups preparing for their playing test.


Two other stations are games or activities which reinforce music skills taught in the unit. This was the first recorder playing test and we are still learning the lines and spaces of the staff. The students chose either relay races or Twister with the giant floor staff. The next station was Treble Toss where students draw a popsicle stick and then aim their beanbag at a specific line or space on the staff. If you would like to learn more about my music centers, follow this link to previous blog posts.


Rubric

My rubric addresses posture, breathing, fingering, hand position, steady beat, rhythmic accuracy, and pitch accuracy. If you would like to download my Recorder Rubric, click here. If I need to save time before the rotation ends, I wait for class to finish to add up the scores.


Incentives

For each note the students learn, they receive a different colored string tied on to their recorder. I use embroidery floss cut to 12 centimeters. I sometimes have students or parent volunteers cut the strings for me. After the strings are tied, the students love to fray the ends. Some units introduce two notes, so the students would get two colors. Some units introduce only one note, so the students would get one string. We start on red and follow the order of the color wheel. The last string is a black string. There is a bonus string in the last unit. The last note we learn is F#. If the students can play "Frere Jacques" (in the key of D) in a round with a partner, they get a gold metallic string tied on their recorders.


I store the strings in my organizer station. Each color has its own drawer. I also have drawers for office supplies like paperclips, sticky tack, rubber bands, pushpins, etc. This organizer sits on a bookshelf behind my desk and makes things so easily accessible. Follow this link for more information on how I organize my classroom, including printable labels for your own organizer.


If you have any questions or suggestions, feel free to comment below!


Saturday, October 18, 2014

Music Centers Assessing the Treble Clef Staff


I have previous posts on how I use centers in my music room. You may click this link to read those posts.  
I recently planned a lesson for 4th and 5th grade classes to review the pitches of the treble clef staff using centers. My class periods are 50 minutes. So, we planned for 10 minutes or so to explain the centers and then each group would have about 10 minutes to rotate at each of the four centers.

Giant Staff Twister

 In one center, students played Twister using the giant floor staff. I used gym tape to create the staff lines on my floor and used the existing 12 inch tiles to keep my lines perfectly parallel. I have one spinner with the letters of the lines of spaces and one spinner to determine which body part should touch the correct line or space. The spinners are available on my teacher pay teacher store. I introduced Giant Staff Twister last year and it has become a favorite for the students.

Treble Toss


Many people who have blogged about the giant floor staff have had students try to toss bean bags on a specific line or space. Here in Kentucky, cornhole has become a very popular backyard game and I knew my students would love the challenge of tossing a bean bag through a hole. So, I used 2 trifold display boards (like you would use to display science fair projects) and created a staff with holes on the lines and spaces. Students would draw a popsicle stick to randomly select a pitch letter. Then, they had 3 chances to toss their beanbag into the correct hole. After their turn tossing beanbags at the spaces board, they would get in the back of the line for the lines board.
This game was a hit! To set up the boards, I borrowed a couple spare student desks from our furniture storage room. One flap rested on the top of the desk and I set a heavy object (a chromatic glockenspiel) on top of the cardboard. You could use a few heavy books or whatever items you want. The bottom flap would rest against the legs of the desk and caused the board to be slightly tilted which helped stabilize the board when the beanbags were tossed. The boards fold flat and lay horizontal in my cabinets, so it will be easy to pull these out and use them again in the future.

Staff Wars


The third center involved the Activboard. I downloaded Staff Wars from The Music Interactive. This is a free download for your pc. They have a new app version which is only 99 cents. The object of the game is to click the correct letter name of each note as it scrolls across the staff. The game gradually gets faster and more difficult. You can select the clef of your choice and also adjust the range of the  notes it will give the students. The students LOVED this game! There are also several other free music games available on themusicinteractive.com. I look forward to downloading some more and trying them out.

Exit Slip and Flashcards

The fourth center involved an exit slip assessment which would be graded. The exit slip had students identifying letter names of some notes on the staff. The students were also asked to practice drawing a treble clef. The exit slips can be downloaded on my teachers-pay-teachers store


As the students finished, they got to quiz each other with flash cards until it was time for the next rotation. The flash cards were a free download from Making Music Fun! The cards are one sided, so I added the letter names on the back so the kids could quiz each other. I printed these on cardstock so they would be more durable.


 I know your students will enjoy these games as much as mine did! Enjoy!

Saturday, December 14, 2013

Nutcracker Resources

I have been teaching the Nutcracker for many years and my resources continue to grow!

The Story

My favorite book to share is a pop-up book that I got on sale one year in February for $3.99. Unfortunately, it is currently out of print. If you happen to see it in a used bookstore, snatch it up! Here is the full information:
The Nutcracker: A Magical Pop-up Adventure
Published by Macmillan Children's Books 2003-10-17, 2003
ISBN 10: 033396134X / ISBN 13: 9780333961346

The students are in awe of this pop-up, especially the spinning sugarplum fairy at the end!

Lesson Ideas

During my first years teaching the Nutcracker, we did little more than read the book and then dramatize the story with a few props and music selections. A couple years ago, I purchased a new resource book to create lessons with more music connections.
Nutcracker Suite
Active Listening Strategies for the Music Classrooom
By Wesley Ball
Book and CD (
$19.99 at westmusic.com)
.It includes many lesson ideas with a variety of activities. There are listening maps, printable worksheets, and a music cd. My favorite activity suggested by the book uses music from the March. When the students hear the trumpets, they are locomotor and march around the room. When they hear the strings, they are nonlocomotor and wave a scarf in the air. During the B section, when they hear flutes, they crawl on the floor and pretend to be mice. Many of the lessons encourage active listening and suggest activities to get the students engaged.

The Ballet

I always show portions of the full-ballet on video, skipping through the longer dance numbers due to time constraints. I was recently introduced to blubbr.tv and decided to use that site to create an interactive quiz. (To learn more about Blubbr follow this link.) I created 2 quizzes, one for each Act. The questions cover some basic music terms such as melody, harmony, dynamics, tempo, and instrument families. It introduces some basic ballet terms--pointe, plié, pirouette, and passé; and some basic theatre elements--costume, prop, scenery, and special effects. The video clips were taken from a YouTube video from a 2008 performance by the Royal Ballet. Follow the links below to find the quizzes.

Art

I also teach visual art once a week and stumbled across a few Nutcracker art projects on Pinterest. The students could be working on these projects while watching the ballet or listening to the music.
Grades 2 through 5 have had fun learning about symmetry making this project. We discuss how the ballerina has linear symmetry and the snowflakes have radial symmetry. Follow the link to the original post on krokotak.com for some printable templates and easy tutorial pictures.


Older students can practice symmetry by drawing Nutcrackers. This would take quite a bit of time to finish and would require more teacher guidance. I have not attempted this with students yet. I haven't had the time to invest in this project. If you have an art teacher at your school, perhaps you can suggest a collaborative unit. More sample pictures are featured on the original blog post at "A Faithful Attempt".


The younger students enjoy making these finger puppets. The free printables can be found on the website of the Birmingham Royal Ballet. To save paper, before copying I eliminated the instruction on each page to fit all 3 finger puppets on one page.  You can see this layout in the top picture of this post.
When searching for the original source for these finger puppets, I noticed they also have a new pair of finger puppets available and a project for a miniature theatre!

Coda

My students are always excited to see my Nutcracker sitting on the edge of my desk, but I think I may be more excited than them. I love the magic of the Nutcracker and look forward to teaching it every year!  Do you teach the Nutcracker? What are your favorite activities?
My 4 year old daughter is now in ballet class. Next year, we will start a tradition of seeing the Nutcracker live on stage. I can't wait!