Showing posts with label integration. Show all posts

Thursday, October 23, 2014

Arts Integration: Line and Melody


In addition to music, I also teach visual art. My student teacher for the fall, Ms. Reed, had a very short placement (only 8 weeks). I didn't want the time in the art room to impede her learning and experience teaching music. So, we decided to integrate art and music for those lessons. 
 
We compared the art element LINE to the contour of a MELODY. Fourth and fifth grade students got to choose their favorite song and draw the shape of the main melody. They practiced drawing the lines with small chalkboards. Ms. Reed and I walked around the room and asked each student to sing their song while tracing their finger along the line. We offered suggestions to change the melody, if needed, to make it more accurate. The students chose a piece of construction paper from an assortment of pastels. The students drew their melody line and then added additional lines in the background in attempt to hide their melody. The chalk lines should be very thick to prevent paint colors from mixing.
 
After drawing the lines, the students used watercolors to paint each section. Some chose to create color patterns while others preferred a random method. It took two 50 minute classes to begin and finish this project. We began painting in lesson 1. At first, the students were disappointed in the darkness of the watercolors. At the beginning of lesson 2, they were able to see how the colors are more vibrant when they dry. They also enjoyed comparing how colors looked different on different colors of construction paper. (Yellow paint on green paper looks different than yellow paint on pink paper) The original plan was to wipe the chalk away and reveal the background color of the paper. But, most students liked the chalk and didn't want to wipe it away.
 
If you are fortunate enough to have an art teacher at your school, this would be a great opportunity to collaborate! Students could draw their melody lines in music class and complete the chalk and painting in the art room. I really fell in love with this project because each student created a beautiful work of art that was truly unique. I try to plan lessons that give the students freedom of creativity to influence the outcome of their art. The response papers allowed students to comment on something they loved about their art and something they wish they could do better. One student commented that she loved "how we could make it our own". This was great reassurance. For that moment, I could pretend that I was a real art teacher and not just a music teacher pretending to be an art teacher. ;)


UPDATE:
This post was featured on Fermata Fridays
on September 18, 2015.


Tuesday, June 25, 2013

The Remarkable Farkle McBride


I teach this book every year to my second graders, but I have also used it as an emergency lesson for a substitute teacher for any grade level. If you are not familiar with the book, you can browse a few of the pages on Amazon.

My musical goal for this book is to introduce or review the instrument families. This book is very well written. The words naturally fall into a rhythmic beat with a compound meter. The vocabulary used is very rich; some of my favorite words selected for this book include beseeching, astonished, superb, renowned, rhapsodical, and tether.

Before reading the book, I introduce the instrument families. Whenever we encounter an instrument in the book, I ask what family it belongs to. Before reading, I also introduce onomatopoeia and alliteration. The students are asked to listen for both of these literary elements.

Onomatopoeia


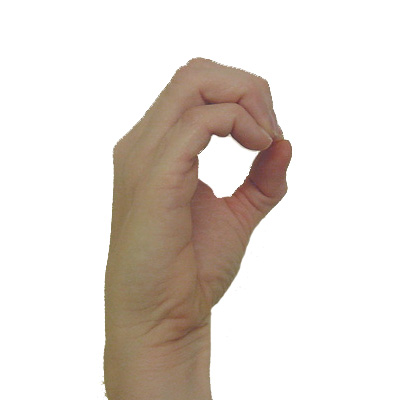
When they hear onomatopoeia, they are supposed to show me the sign language "O". Each instrument features their own onomatopoeia and when they instruments come together at the end, I have the students try match the words to their instrument. We also discuss the percussion sounds, discovering that "clang" probably comes from a metal instruments.
We also learn how to spell onomatopoeia. In my 8th grade English class, we were given onomatopoeia as a spelling word. My friends and I discovered that it was easy to spell the word if you sing it to the tune of "Old MacDonald." To this day, I always hum the tune to spell the word and I will never forget it. I practicing singing it with the students and then we play a trick on the classroom teacher. When the students line up, they ask the teacher if onomatopoeia can be a bonus word on their spelling test. The first year I did this, the teachers thought I was crazy. They were astonished when the majority of the students spelled it correctly on their Friday spelling test! The power of music is amazing! :)

Alliteration


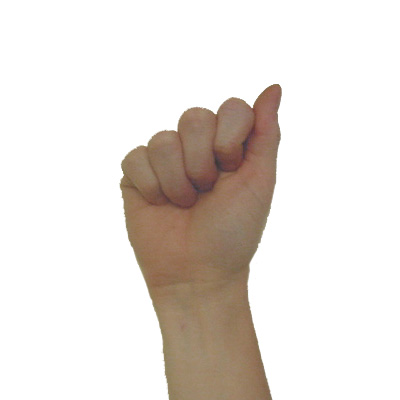
When they hear alliteration, they show me the sign language "A." There are numerous examples of alliteration. Here are some of my favorites:
"Farkle flung his flute"
"boulevards buzzed"
"whimpy and whiney"

Of course, sometimes, we found both onomatopoeia and alliteration in the same example.

"boom, bash, clanga ma clash"

Some students would use two hands to show both letters. Since I was using one hand to hold the book, I would use my other hand to switch between both letters.
I really like the use of hand gestures. Its a quick way to visually assess the entire class and see if most students are understanding the concept. Its also a nice alternative to everyone yelling out the answers or raising their hands to try to give the answer.

At the end of the book, I usually demonstrate each of the instruments Farkle played in the book and pick some students to try them out too. I pass around resin so the students can see it. I pass around a conductors baton (a cheapo, not my Mollard!) This lesson is definitely not Orff-based, but the students are always so intrigued with this lesson. It is a favorite.

Feel free to comment below and share your ways to use Farkle in lessons.


Saturday, October 13, 2012

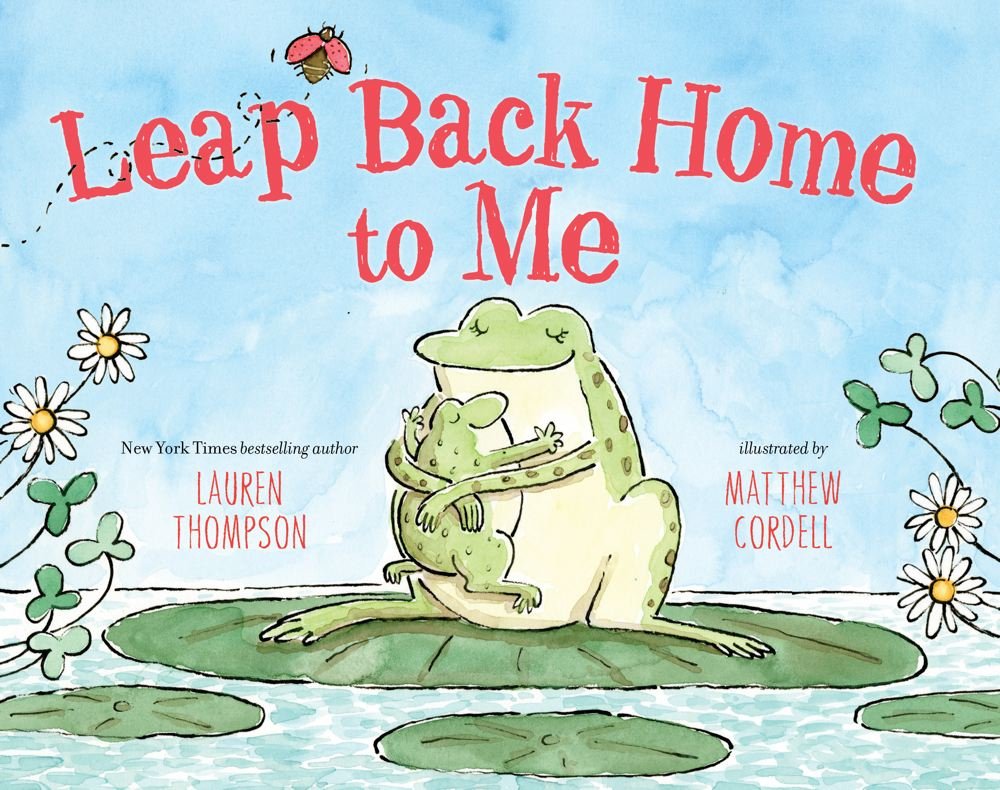
Leap Back Home to Me


I love using children's literature in the classroom. Last spring, when browsing the book fair, this book immediately caught my attention. The title, "Leap Back Home to Me," made me think of how we call the pitch "do" home base. A few weeks ago, this book was used in a second grade lesson to introduce melodic improvisation, phrasing, and ending a phrase on "do."

Even though I had been looking forward to using this book in a lesson all summer long, my student teacher was actually the one who got to teach this lesson. The book is very rhythmic and is set up in stanzas of 4 lines. In each stanza, the first 3 lines are different places that the baby frog leaps when playing and exploring away from the momma frog. The 4th line always repeats the phrase "leap back home to me."

When my student teacher first read the book she used a speaking voice until she got to the phrase "leap back home to me." On this phrase, we used a simple melody "mi, mi, re, re, do." The students naturally began patting a steady beat and soon caught on to the form of the stanzas and began singing along with the recurring phrase "leap back home to me". 

After finishing the book, the student teacher directed the students' attention to the magnetic hand signs and had the students echo the pattern "mi, mi, re, re, do." She brought the students' attention back to the form of the poem asking how many places the frog leaps away from the momma before leaping back home. She asked them to pat a steady beat and count how many beats are in each sentence. (Answer: 4). Then, she asks them to calculate how many beats we pat before we sing "leap back home to me" (Answer: 12). They practice this pattern of patting 12 beats and then using hand signs to sing "mi, mi, re, re, do" before moving to the barred instruments.


Once at the instruments, she instructs them how to properly remove the F and B bars for C pentatonic. Using the "fake instrument," she has them echo some short melodies with mi, re, and do. Some melodies end on do and some do not. She asks them which phrases sound like they are finished (Answer: the ones that end in do). Then, she has the students echo the pattern "mi, mi, re, re, do" from the phrase "leap back home to me."

When the students can successfully play the melodic pattern, she asks the students to click their mallets for 12 beats and then play the melodic phrase. When students can successfully perform the pattern of 12 clicks and then the melody, she allows them to improvise on the 12 beats picking 12 bars to play before playing the   phrase "mi, mi, re, re, do."

Lastly, the students are asked to play along while the teacher reads the book again. At first, the students were playing way too loud. Even though the teacher was using the pendant microphone, it was still impossible to hear the book with 24 kids playing very loudly on their instruments. After asking the students to pretend like they were tiptoeing instead of leaping, they were playing quiet enough to hear the story. The students seemed to enjoy the book and were not afraid to explore the instruments and improvise. By the end of the year, I will introduce rhythmic building blocks and begin to get students comfortable improvising with rhythms using ta and titi.

Where Can I Find This Book?


Saturday, May 12, 2012

Gotta Keep Reading Flash Mob

As the end of the school year closes, many students were asking me if we were "gonna do another one of those things." Last year, I organized a flash mob at our school. Every student, from kindergarten to 5th grade, was singing and dancing together on the last day of school. Due to the scheduling of our state testing, we are not going to have a school wide flash mob this year. However, our 5th grade is planning something special for their send-off ceremony. More on that later :)

The Inspiration
On December 11, 2009, Ocoee Middle School performed "Gotta Keep Reading," a parody song to the Black Eyed Peas's song "I Gotta Feeling." Since then, many schools have been inspired by Ocoee and get their own school involved in a flashmob. Most of our choreography was borrowed from the performance by Roosevelt Elementary. I also had to edit some of the lyrics because we were not doing a Read-a-thon. Our flash mob was meant to inspire the students to continue reading throughout the summer break. Here is our performance:


How Did I Teach It
For the last 3 weeks of school, I taught the students the lyrics and choreography during their music class. About 3 days before the performance, we rehearsed each grade together during their special area time. The performance you are seeing is the first and only performance with everyone all together. 
I made videos so the students could practice at home or in their homeroom classroom if they wished.  THe links were placed on my classroom blog for easy access.  There had to be a separate video for each grade. These tutorials can be found at the following links:

Preparations For a Smooth Performance
The soloists were chosen because they knew the song and movements very well. During their music class rehearsals, I had observed the students and selected "leaders" so that if someone forgot a movement they could copy the person in front of them. Most of the students were in height order (shortest to tallest) with designated leaders spaced throughout the line. The teachers were given the list so they could have the students in order before coming outside. 

When we rehearsed outside with each grade level, we realized that the diagonal bus lanes caused the students to wander during the performance and their lines ended up crooked. So, I knew they would need some kind of marker to stand on. That morning I arrived at school very early to use sidewalk chalk to mark the pavement. At this moment, I cannot remember the spacing, but I believe there was a foot and a half in between each student. I used a long piece of yarn to help keep a straight line. I tied it to a bucket to keep it still and stretched the yarn until it was perpendicular to the curb in front of the school. I laid a yard stick down to measure and drew big X's where each kid should stand. I used a different color for each class in a grade so they would not get confused. I wrote the teacher's name at the end of the line closest to the school so the teachers knew where to line up their kids. (The teachers were also given a map, but I'm sure the chalk  markings helped.) I was in front of the students (out of camera range) so that the student leaders could copy me if they needed. 

Capturing the Memory
Our librarian was in charge of recording the event and editing the video. I used Audacity to record a couple former choir students to singing the song. I was able to use the GSnap tool to apply the auto-tune quality to the voice. Both of these are free downloads. I find out about GSnap by searching "TPain effect" on youtube.com. (YouTube is full of tutorials to do just about anything!) The audio and video were combined for the final product.


If you have any questions, feel free to ask. I tried to provide as many details as possible so that you may have a good idea of what planning and preparations it would take if you try to plan something like this. It was an awesome event and a memory the students will never forget!