Thursday, May 31, 2012

Are You Snipping?


If you are not familiar with the Snipping tool, get ready for your world to be rocked!

How To Use It?

Most people think the Snipping Tool was new with Windows 7, but it is installed on both Windows Vista and Windows 7 operating systems. If you are not sure if you have this tool, do a search in the start menu or look under Programs and Accessories. The Snipping Tool can be used to take a picture of anything on your screen. It is very basic and simple to use, but you may visit Windows for a simple tutorial and frequently asked questions.

If you learn best by watching someone else, you may find this video tutorial helpful: (video by VideoTraining.com.au)
At the end, the video demonstrates how to pin the tool to your task bar or start menu. As you start using this tool more frequently you will definitely want it easily accessible. I have my Snipping Tool pinned to my task bar.

When To Use It

1. Capture images from your computer or the web to use on your interactive flipcharts or powerpoints. Specific to music, I like to snip musical notation from Finale Notepad (or the notation software of your choice) and paste it into my flipchart.

2. Create screenshot tutorials for students, staff, or your blog.

3. Create picture collages of just about anything. (Mrs. Teachnology suggests using collages as writing prompts).

4. Capture text from a word document to post on your blog, classroom webpage, or newsletter. (Math Coach's Corner demonstrates this by taking a snip of her grading scale and pasting it into another word document.)

5. Email your snipped image to anyone very quickly. (This was demonstrated in the video above).

6. Take a snapshot from a paused video. It may not be the best quality picture, but it is probably the simplest way. Play the video with Quicktime, Windows Media Player, or the program of your choice. Pause the video at the moment you would like an image. You may use the slider to adjust the image so that it is more focused. Then snip away!

7. Create customized worksheets and tests. Using a document camera or a scanner, you can snip individual questions from different worksheets and tests and combine them into a brand new document.

8. Create an image for a pin when no image could be found. (It is frustrating when you try to pin something and the only image Pinterest can find is the header art of the blog. Now, you can snip a chart or the title heading to use as your art to pin the page and give a better clue at the material you are trying to share.)

9. Capture images from  your interactive flipcharts or powerpoints to save for reference later or to post on your webpage for parents and students to access at home. You could also print them for a small personal reference or study sheet.

10. Capture images from textbooks or other printed materials to insert into your flipcharts or powerpoints. (You would need a document camera or scanner.) This is my favorite thing to do so I only have to adjust the camera focus and position the book one time. I snip the image, paste it into my flipchart, and it is ready when I teach that lesson to the other classes in that grade.

These are just 10 ways the snipping tool can be used for the classroom, but the possibilities are endless! I hope you find a way for the snipping tool to make your life a little easier!


Wednesday, May 30, 2012

Star Musicians Classroom Expectations

During student teaching, I developed these 5 basic classroom expectations:

1. Enter and leave quickly and quietly
2. Show respect to others and the instruments
3. Participate in class activities
4. Raise your hand to speak
5. Follow directions

I wrote them on a poster board and taped them to the wall. I quickly learned that these rules did not mean anything if there were no consequences to accompany the rules. Also, the rules meant nothing to the younger students who could not read. So, I knew I had to revise my discipline system.


 First, I wanted something visually appealing with picture clues to help the young ones understand the rules. Each rule is printed on a 8.5 x 11 sheet of cardstock and laminated. I found a pack of 30 gold die cut stars at the Dollar Store for $1.00! I laminated them and put some magnetic tape on the back. I placed one gold star next to each rule. If the class is not following one of the rules, the magnetic star is taken away. I decided to call it STAR MUSICIANS!

Star Musicians System


On day 1, I try to talk as little as possible and get right into music-making, but you must go over your procedures and expectations. Instead of boring them with a lecture, I pick students to look at each poster and tell the class what they think we should do in music class. The picture clues are especially helpful for the younger students who cannot read yet.

Each class starts with 5 stars, but if anyone is not following one of the rules, the entire class loses a star. At the end of each class, I record how many stars remain on the board. At the end of each month, I would reward one class in each grade that received the most stars. They would become star musicians for the month and get to hang a door hanger plaque on the flag pool outside their classroom door.

Individual Discipline Records

Each student receives a conduct grade for music class in addition to their music grade assessing core content. To keep track of conduct, I make notations in the grade book anytime a student is not following one of the expectations. I mentally number the rules 1-5 in the order they appear hanging on my board. If a student is repeatedly forgetting to raise their hand before speaking, I would mark X4 next to their name for that day. That is a short-hand that tells me they were not following rule number 4. If there is a major violation (such as hitting another student or cursing at the teacher, I make a special note on the bottom of the page in the white space). This way, I have an accurate record for each student. It makes it easy to do report cards each quarter and it also protects me if a parent questions the grade their child received. 

Communicating With Classroom Teachers

In this picture, you can see the rules next to the magnetic stars. To the left of my classroom rules you will see a rainbow chart for our school-wide discipline system. This system was newly-established this year. As a special area teacher, I LOVE having the entire school on the same discipline system. Also, this system is both positive and negative. Each student has a clothespin and starts the day on green (Ready To Learn). Throughout the day as they make good choices or bad choices, they may clip up or clip down. I love the fact that they can clip up! Often a student would come to me for music class in a defiant mood and wouldn't even try to behave for me because they were already on red or didn't have any more sticks to pull. With this system, no matter what choices you make, you always have a chance to redeem yourself with good choices. We do have a rule that in special areas they can only clip up or down one time. 


Obviously, the students' clothespins cannot travel with them to special area classes. So, we have a miniature rainbow chart (shown above) to remind the students of the color order. If the students clip up or clip down in my class, they write their name on the small clipboard. There is a smiley face and sad face to help the students who cannot read. In my class, the students write their own name on the clipboard. That walk to the clipboard is a nice reward for those who are going to clip up and makes those clipping down more responsible for their actions. Plus, I can continue teaching while they are writing their name on the clipboard. The issue of honesty has come up on a few occasions where someone has written their name on the wrong side or pretended to write it. With cases of dishonesty, the student will automatically clip down twice. This new rule has eliminated most dishonesty. At the end of class, I take the paper off the clipboard. The clip downs become X's (with the corresponding numbers for the expectations they did not meet). If a student clips up, I place a star next to their name for that day. This gives them bonus points to bump their grade up to exceptional. the paper is then handed to the classroom teacher when it is time to leave and the students will move their clothespins when they get back to their classroom.

Free Downloads


Coda: Art???

Do you have an art teacher at your school? New this year, my principal asked me to teach art one week of the month during the music time. I have a separate classroom for art class, so I just modified my music expectations slightly. If you would like these for your art teacher, they are also available to download!


Tuesday, May 29, 2012

Making and Swapping Buttons

I just followed a simple tutorial from Between Naps on the Porch:

"How to Make a Blog Button With Grab Box Code Underneath for Your Sidebar


I now have a grab button of my own! If you copy the code under my button and paste it into a box on your sidebar, my button will appear on your page. 

I have already listed other music blogs on my page "Other Music Blogs." I checked them for buttons and have already grabbed the button from "Melody Soup". Unfortunately, none of the other music blogs I follow have created buttons. This tutorial was very simple. If you create a button for your blog, please let me know and I will add it to my sidebar. Likewise, please grab my button!

Monday, May 28, 2012

Free Online Metronomes


For several years, a pendulum metronome was on my classroom wishlist; I wanted students to be able to see the arm moving side to side with the beat. But, with our dwindling budget, I could never justify spending that much money on a visual aid. The classic Wittner is currently on sale on westmusic.com for $57.20.

In 2010, I started searching online for interactive metronomes. Most of the metronomes I found were digital. They were perfectly fine tools for musicians to use for practicing, but none provided the moving arm that I wanted the students to see. 
www.metronomeonline.com
www.webmetronome.com
advanced.bestmetronome.com
  I was looking at the suggested resource sites from my district's technology department and saw the online-stopwatch site. They have a lot of neat tools for counting time, etc. So, I emailed a suggestion that they add a metronome and they were very interested. They sent me emails as they were developing the tool and I got to provide input throughout the design process. It felt amazing to make a suggestion and have someone actually listen. 


www.online-stopwatch.com/metronome

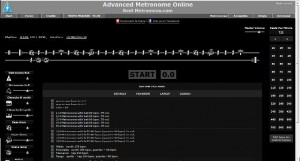
This metronome has 6 different sounds to choose from. It has a volume control so you don't have to change the master volume of your entire computer. Down in the corner the Italian tempo terms are listed next to the beats per minute (one of my suggestions). This is also available for free download! They even wrote a little message at the top giving me credit for the suggestion!


If you are not familiar with online-stopwatch.com, you should check it out. There are many varieties of timers and counters. A few are available for free download. I have the basic timer as a shortcut on my computer desktop for quick and easy access. Many teachers use these timers everyday for timed activities. There are many varieties you can change them often so the students do not get bored.

http://www.timrylands.com/2011/03/17/clocks/

Although I did not find this during my searches in 2010 (it likely was not in existence then), today I found another mechanical metronome that features a movable pendulum arm. This metronome looks more life-like. When you first start the metronome you even hear sounds as you wind it up. However, the background is black and that makes it very hard to see on the projector in my classroom. Also, it only features one clicking sound, whereas the online-stopwatch metronome has six sounds to choose from. You may choose which one works best for your classroom.
simple.bestmetronome.com

The most important lesson I learned during this entire process: "ask and ye shall receive." I was frustrated that I could not find the resource I wanted. I thought other teachers may have the same frustrations, so I made a suggestion and someone actually listened! How amazing! It would be a wonderful world if every concern and suggestion were answered so swiftly. I realize this world is in my fantasy, but you never know who is willing to listen if you don't even bother to ask! I hope you can find some of these free online tools helpful. If you can't find a tool to meet your needs, don't be afraid to email your suggestions! Someone might actually listen!

THANK YOU, 
ONLINE-STOPWATCH.COM, 
FOR LISTENING!

Thursday, May 24, 2012

Where's Our Common Core?


On August 30, 2011, the National Coalition for Core Arts Standards had their first task force meeting. Among many things shared from this meeting is the timeline for tasks to be completed.


As you can see, a draft version is planned to be available in July 2012 and the revised version released in December 2012.

On November 1, 2011, the College Board presented the results of an analysis report comparing the arts standards of many countries around the world as well as several states here in the US. The powerpoint presentation is available online. 

NCCAS also explored options for the website to house the standards. This seems as though it will be a very helpful tool. It appears as though it will include samples of student work to help teachers better understand and interpret the expectations of the standards. It also appears as if there will be ways to submit photos of student work. If anyone is noticing or interpreting anything different about this please share your thoughts in the comments below.


 On January 24, 2012, the major pillars were announced  on a live web-broadcast.


A Draft of the Overarching Framework was also released and is available as a pdf.

This is a very brief explanation of important stages that I have noticed in the development of our Core Arts Standards. The NCCAS wikispace has many more details and documents available for you to view. They explain who is on the committees and how they were selected. There is a calendar of events to keep up to date on the current stage of the process. I will be checking on the wikispace periodically and will post any important news and developments.


UPDATE:
There is now a second post about updates to the Core Arts Standards. You can find it at this link "Update on Core Arts Standards."

The Resources from Denise Gagne


If you are not familiar with the books and resources by Denise Gagne, you need to check her out! I am very fortunate to have met Denise during the summers of 2007, 2008, and 2009. We both attended some Orff courses together at the University of Kentucky (Level II, Level III, and Curriculum Development). The first summer she was there she used her maiden name so that no one would recognize her. Over the two weeks I had shared many conversations and lunch dates with Denise and considered her a friend. Imagine my surprise when she revealed her true identity on the last day! I immediately thought of all the books I had on my shelf at home that she authored. Then, I tried replaying all the conversations we had over the two weeks to count how many times she must have thought I was an idiot! Aside from the trickery she played on us that summer, she is a wonderfully, genuine person who is very passionate about elementary music education.

BIO

Denise Gagne is a music specialist with 35 years of experience teaching band,choir and classroom music from pre-school to College levels.  Denise has completed Kodaly Level 3 studying with Lois Choksy.  She has completed Orff Level 3 and additional Orff training with Cindy Hall, Jay Broeker, Jos Wuytack, and Donna Otto. Denise is currently director of the Red Deer Children’s choir in Red Deer,Alberta and managing editor of Themes &Variations. Her choirs and bands have won many awards at Music Festivals and have performed for local and national sporting events,on national radio and even for the Queen.  Denise is the author or editor of more than 80 publications for preK- 6 music teachers. She has been a workshop presenter in every Canadian province and territory and more than 39 states. She presents regularly for Orff and Kodaly workshops, preschool and kindergarten conferences in Canada, the USA,Europe and Australia!   


My Favorite Publications

The Orff Source. I use this resource quite a bit. My favorite feature in this book is how she sequenced the songs by tone set. You can see for yourself in the table of contents in this Sample Preview. Also, most of the songs also include simple instructions for a game or activity to accompany the song. Volumes 2 and 3 are now available, but I have not yet been able to purchase them yet.

Singing Games Children Love, Vol. 1-4. These books also have easy-to-understand instructions for the games and activities that accompany the songs. Also, these books have cds! These books and cds are perfect for a substitute teacher who has no musical skills.


 I use these rhythm and melody flashcards every year. The rhythms start with simple stick notation and are grouped by color into different levels of difficulty gradually adding more complicate rhythms.  Rhythm Sample. The melody flash cards are color-grouped by pitch set. Melody Sample. My students love when they get to try a new color! They are printed on sturdy cardstock. I have not laminated them and they are still in pristine condition. But, I am the only one to handle them. Students do not use these on their own. The flashcards are also numbered so that you can get them back in sequential order (a feature I appreciate anytime I accidentally drop them in the floor!) 

Denise On YouTube

In addition to her publications, Denise has provided many videos and demos for free on YouTube! Here are some of my favorite videos:
 This "Mr. Potato Head" game/song is similar to "Doggie, Doggie Where's Your Bone." During this game the teacher will get to hear individual students sing in a nonthreatening environment and can also test students' listening skills as they identify the location of the body parts and try to put Mr. Potato Head together again.

"Yesh Li Yadiyim." I love how this Hebrew dance starts in pairs and gradually ends up with the entire class together. This would be a great opportunity to discuss doubling and bring in math connections.


Cup Game Listen 3 #2. I love how patterns change with the form of the song. The patterns are simple and repetitive so the kids can switch easily between the different patterns.

This is a video from a Saturday workshop at UK during the Orff Level courses. Denise shared the cup game with us and then let us create our own patterns. (Yes, I am in this video :P)


Free Newsletters

You can also sign up for free newsletters from Denise which feature useful tips for the classroom and free lesson ideas. Visit the Theme & Variations website to sign up. Past newsletters are also available online for you to view at any time.

Monday, May 21, 2012

My Mentor, Dr. Amchin

When I first became a music major, I thought I was destined to become a band director. High school band had provided me with some of my best memories and I didn't want that to end. When I took Dr. Amchin's elementary methods course, my whole outlook and career path changed.

Although I won't get into the details, I did not have many fond memories of elementary music. Until college, I had no idea that elementary music could involve more than singing along to a cd. Dr. Amchin got us up and moving, creating, exploring, and playing instruments. I quickly discovered that I belonged in this field of our profession.

Dr. Robert Amchin is currently head of the Music Education department at the University of Louisville and travels around the world teaching workshops on Orff and elementary education. Click here for a more detailed bio.


Dr. Amchin has recorded many of his lessons during workshops abroad as well as during his courses at UofL. You should check out his YouTube channel.


Here are a few of my favorite videos:

Nonverbal Pentatonic Echoing.
Dr. Amchin has several nonverbal clips that are really fascinating.


I really like how he keeps the dance nonlocomotor at first to teach the direction changes and to get the students used to the phrase lengths and form of the song. Humming the music instead of counting steps is also a trick I picked up from Dr. A.


This is EXACTLY how I teach any round or melodic ostinato. I teach everyone the melody and then I sneak in the extra part to see if they noticed. Then, I gradually add more people to the extra part until both groups are more equal.

Again, many more videos can be found on Dr. Amchin's YouTube Channel. If you ever have the opportunity to attend one of his workshops, I assure you your time will not be wasted.

Technology In the Music Classroom


With our recent construction renovations, we were fortunate to get the latest technology in our classrooms.

We have Elmo document cameras. Which have made overhead transparencies obsolete. I am able to display worksheets on the camera so that students can see exactly how to fill out their own worksheet. I am able to display student work on the camera for the class to see. I love to share student compositions so that we can perform their work.

We also have ActivSound teacher pendant microphones which can amplify our voice so that every student can hear the instruction even when our backs are turned. This has also been a voice saver when I am trying to yell out dance instruction over the music. I do not have to strain my voice. The mic is also a motivator for students. It is a reward to get to come and sing into the microphone for the class. There is also a jack to insert your mp3 player and play music through the ceiling speakers. This is an amazing feature!

We also have a set of Clickers for each grade level and one set for the special area team. I am the only special area teacher who has tried to utilize them so they are stored in my classroom. The Clickers are an amazing tool for assessment. It does take some time to hand out the clickers, but I keep the students in alphabetical order and keep a record of their Clicker numbers. If their teacher has assigned them a Clicker number in the classroom, I try to keep those numbers so not to confuse the students. The best part, in my opinion, is that the software grades the test for you! As you are all aware, finding time to grade papers is a constant problem. The Clickers allow me to assess the students more often and not feel like I'm causing myself more work to do. Plus, if you show the questions on the ActivBoard, you are saving trees by not wasting paper, and saving time because you won't be standing in line at the copy machine.


Our most useful and impressive technology are the interactive white boards. We have the Promethean ActivBoards. 

These are INTERACTIVE white boards. Many teachers forget the most important word: INTERACTIVE. If the students are not getting a chance to come up to the board and manipulate charts, you are not using the board for its full potential. I have developed many flipcharts over the past 3 years and am still learning new tricks and tools.

Here is a link to the flipcharts I have uploaded to Promethean Planet:
They are free to download with a Promethean Planet account. So far, I have only uploaded 2 charts ("Once I Caught a Fish Alive" and "I Spy Elenore"), but I will be polishing and uploading more charts this summer. I will, of course, keep you posted as well.

Sunday, May 20, 2012

Line Leader

My classroom door opens into the room rather than into the hallway. I would constantly get annoyed when students would line up too close to the door and then I had to make them scoot back so I could open the door.   Some people put tape spots on the floor to show where the line leader should stand, but I decided to hang something from the ceiling.

I have many music notes hanging from my ceiling to help provide a warm, welcoming atmosphere. I used to have the treble clef in the center of the room. Now, I have placed the treble clef near the door to show where the line leader should stand. Now, I have plenty of room to open the door without hitting anyone or asking them to move.


At first, this was just a simple solution to solve an annoying problem. But, later, I realized that it was helping reinforce some music vocabulary. When reading pitch notation, the students made the connection with the treble clef at the beginning of the staff and the beginning of our line. I had never even thought of that before! Now, when introducing the treble clef, I always refer back to the line leader spot.

Saturday, May 19, 2012

"No, your other left!": Understanding Spatial Awareness and Cognitive Development

Do you ever encounter problems in your lessons because your students lack lateral spatial awareness? Many musical activities require students to understand the difference between their left and right. Dances and hand games in a circle formation are more difficult if they involve lateral directions of left and right because they cannot be mirrored from across the circle.  When playing xylophones and other instruments, children often struggle when asked to alternate their hands to play even simple rhythms or melodies.  Understanding the cognitive and motor development of a child can aid music teachers in developing lessons and adapting activities for any age level.

Spatial Awareness and Directionality

Many studies have proven that the most difficult concepts for children to understand are the lateral directions of right/left and clockwise/counterclockwise.  Piaget’s theory of egocentric representations to explain the difficulty of learning these concepts.  Piaget explains that children who fail to take a different perspective than their own have egocentric representations (Piaget 1971).  The direction of left and right depend on how a person is standing.  In order to perform the actions correctly, you must make a mental image of the object and perform imaginary manipulations.  Left and right refer to the respective sides of the body, not a certain wall or location in the room.  It’s not uncommon for children to learn the directions forward and backward and up and down before they learn the directions of right/left and clockwise/ counterclockwise. Research has proven that the concepts of left and right directions require high cognitive development, but in order to plan successful lessons, music teachers need to know when to expect this development in their students.  

Cognitive Development

Phyllis Weikart has developed seven stages of motor development from simple to complex.


Dances or hand games in a circle formation that require specific movements for left and right should wait to be taught to second grade because students will need the cognitive ability to continue their sequenced movements while seeing the opposite movements performed by students across the circle.

Presence of  Visual Aids

During my graduate course in quantitative research methods, I researched this topic and proposed a study to test the effect of visual aids on students' lateral spatial awareness in the music classroom.


 Although the research study was not completed, I still keep the posters in my classroom and train my students to refer to them anytime they are having difficulty remembering their lateral directions.


Although I do not have any scientific evidence to support my theory, these posters have been hanging in my classroom for 6 years and I believe they are helpful to many students.

Friday, May 18, 2012

Organizing Instruments

My first year teaching, I had organized all the instruments in a wall full of lockers, and put sticky mailing labels on the outside of the lockers to show where they should go. The problem: most kids couldn't read the labels or they didn't know the real name of the instrument anyway. So, I ended up having to put every instrument away. The students would bring them to me one group at a time, but I was still doing the major lifting during clean-up.

That summer, I decided that I needed picture labels. I decided to use real pictures instead of clip art so that the picture looked exactly like my instruments. Many of the images were found on West Music. If I could not find the specific picture of my instrument I used a Google image search. Since then, our school has been renovated and I no longer have skinny student lockers to store my instruments. I have nice, deep, wooden cabinets. They are fabulous! Below you can see a few picture of the outside of my cabinets.


Here is a close-up of two section of cabinets that I use the most. They contain mostly unpitched percussion. The labels are placed  in front of where the instrument actually belongs. 


The left cabinet contains mostly cultural instruments. The cabinet to the right is the one used most often. Since the right cabinet contains mostly small handheld percussion, I have to use boxes, plastic dishpans, and whatever I can find to help keep instruments properly separated. In the picture below, you can see that I also have labels for the boxes and plastic containers as well as the outside door of the cabinet.


The top row is lacking some labels (that is on my summer to-do list). The second shelf also has one miscellaneous drawer with a ratchet, vibraslap, flexatone, slapstick, etc. I need to make smaller labels for this drawer as well. Students are always asking me where those instruments go. However, most of the students have no trouble being self-sufficient during clean-up time. I always ask one instrument group at a time to go put their instruments away so they are not so crowded. Other than calling the next groups, I have to do very little monitoring of instrument clean-up. I can spend my time recording discipline issues in my grade book and preparing myself for next class.

Also note: in order for your students to be self-sufficient in instrument clean-up, they must be able to reach the instruments. I have placed most of the basic percussion instruments used with Kindergarten and 1st grade on the lowest shelves. The more obscure percussion instruments that are used less often are placed on the higher shelves because they are used mainly with older, taller intermediate students. (I learned this mistake the hard way. My first year teaching I placed the Lollipop drums on the top shelf of the lockers. After several months helping kindergartners reach the top shelf, I finally had my "ah-ha" moment!)

More details and pictures showing the inside of the left cabinet can be found on a previous post regarding Boomwhacker storage.

As I have already stated, these labels allow for students to be self-sufficient and we have a quicker clean-up time. Also, the picture labels on the front of the cabinets are nice visuals when students are given freedom to be creative during a lesson like brainstorming sound effects to accompany a story.

So that you do not have to reinvent the wheel, I am sharing my files! Now you may quickly print most of the instruments labels you may need.  If you have instruments that I do not have labels for, you can do a Google image search and copy/paste into a word document.


***Please note, I do think it is important to print in color, if possible. The color helps the students identify and locate an instrument more quickly. I also laminated my labels so that I could move them to a different location without ripping them if I got the urge to rearrange the storage. My first set of labels lasted about 3 years before the edges of many labels started to curl up where kids had brushed against the lockers during movement activities. When I got my new wooden cabinets 3 years ago, I decided to print new labels. (It would be a sin to put those old curled up labels on these beautiful wooden cabinets!) Instead of throwing my old labels away, they became the inside labels for the storage boxes and bins.

Thursday, May 17, 2012

Orff Visual Aid

There are several posters on the market to show Orff bar set-ups. One popular example is sold at West Music:


For most people, these visuals may serve their purpose. However, I wanted a visual aid that I could manipulate. I wanted students to watch me demonstrate taking bars off properly. I wanted students to see what each step would look like as we take off one pitch at a time or swap naturals for accidentals. So, during the summer after my first year teaching, I created my "Fake Instrument," as the students and I have called it over the years.


I used black and white foam core board. (I actually reused a couple boards that I had used for presentations in my public speaking course. But, you can splurge on some new boards if you don't have any you can repurpose.) I made my calculations for the white bars and used a pencil and yardstick to trace my lines. I used a box cutter to cut the foam board. I printed the letters on cardstock, cut them into squares and used a glue stick to center them on the bars. I cut the mounting board out of black foam core board (again, repurposed). It was just slightly more narrow than the white bars, just as the bars on a real xylophone extend   over the edges of the sound box. The back of the black board I placed 2 long horizontal strips for support and some black pipe cleaners as hangers.


I used velcro dots to secure the bars to the backboard; two dots per bar. (These are $3.79 online at Joann's. They can also be found at Walmart, but their online site did not list a price.)

Just last year, I got tired of the students constantly asking, "what do we take off?" (even though I had probably said it 2 or 3 times already). So, the silver letters were added on the blackboard with a silver, metallic Sharpie.I already had these Sharpies; I had bought them to label my black music stands with our school name. (This 2-pack is found at Walmart for $4.13)


Of course, I needed some accidentals, they are stored in an old, metal candy tin (again, repurposed).


If you put a poster on the marker board you would have to turn your back to the students when demonstrating a melody. I put binder clips on the top of a music stand and hang the visual aid from the pipe cleaners. I can stand behind it and pretend play it while I sing the pitch it should make. I never have to turn my back on the students.


I have been using my "Fake Instrument" for 6 years now. It will eventually need to be replaced, as some of the bars have really become bent. But, I'm not ready to spend more time and money on a new one yet. It can last for a few more years at least.


Boomwhacker Storage

I have recently seen a post floating around Pinterest showing a way to organize your Boomwhackers. Rainbows Within Reach shows a cardboard file stacker turned on its backside with cardboard dividers inserted into the slots to separate each boomwhacker. Although she has many great ideas for organization around the classroom, I kept scratching my head when I saw this picture. (Please note that this system does not belong to Rainbows Within Reach. She took the picture when she was visiting another elementary music classroom.)

I'm all about organization; I have an entire Pinboard devoted to it. But when I look at a post on organization, the first thing I ask myself is, "how long would it take someone to create that?" One must evaluate their system to make sure they're not wasting their time with details that are not necessary. When I saw Rainbow's picture of storage system, I didn't understand why each Boomwhacker needed it's own little cubbie hole. I just thought of the time it took to cut the cardboard dividers and to get them to fit just right snug in their place without moving around while the children are getting the Boomwhackers in and out. The individual cubbies are not necessary. Also, some of the smallest Boomwhackers looked difficult to reach because the cardboard was taller than the Boomwhacker. (To solve this, the teacher could put something in the bottom of the slot so the Boomwhacker does not fall all the way down. Something quick and easy could be wadded up newspaper.)

Here is a picture of my Boomwhacker storage system:


Each pitch has it's own slot, but there is really no need for each Boomwhacker to have their own cubbie space. I have stored my Boomwhackers this way for 6 years and the cardboard boxes are still in pristine condition. It does not require any maintenance. In the picture below, you can see that I reused boxes that came from brand new sets of hand drums. The smallest frame drum boxes are shorter so it is easy to reach even high do! If you were not fortunate enough to have purchased a brand new set of hand drums, any set of narrow boxes would do. You could cut the height to the correct size for the shortest Boomwhackers. (I also like organizational systems that you can make for free! I always think twice about something before I throw it away. I also have a pinboard devoted to repurposing.) 


I do not have any of the long lower octave Boomwhackers, but I do have some Octavator Caps that make the pitches lower. I store them in a plastic index file and just stick the box in the open space near the upper octave. I have a set of 8 and they fit perfectly. This index card box was something I had laying around, so no money was wasted purchasing something new.


I keep my box of Boomwhackers in the bottom of my storage cabinet. When I need them for a lesson, it is easy to just slide the box out and put it back out of the way when finished.


I especially like the fact that students can easily put the Boomwhackers away without teacher assistance. During clean-up time, I call only one pitch/color at a time and rarely do I have a kid put their Boomwhacker in the wrong slot. Also, with this arrangement, the students can visually see the progression from low to high (long to short). They almost always make the connection to how the xylophones are arranged. This is the system that works in my classroom. I hope someone else finds it useful as well.